
Ticket Design Templates
Ticket Design Templates let you create custom-branded tickets for your events. Design professional tickets with your visual identity, access plans, and partner logos, then reuse them across categories and events without starting from scratch.
Ticket Design Templates let you create custom-branded tickets for your events. Design professional tickets with your visual identity, access plans, and partner logos, then reuse them across categories and events without starting from scratch.
1. Accessing Ticket Design Templates
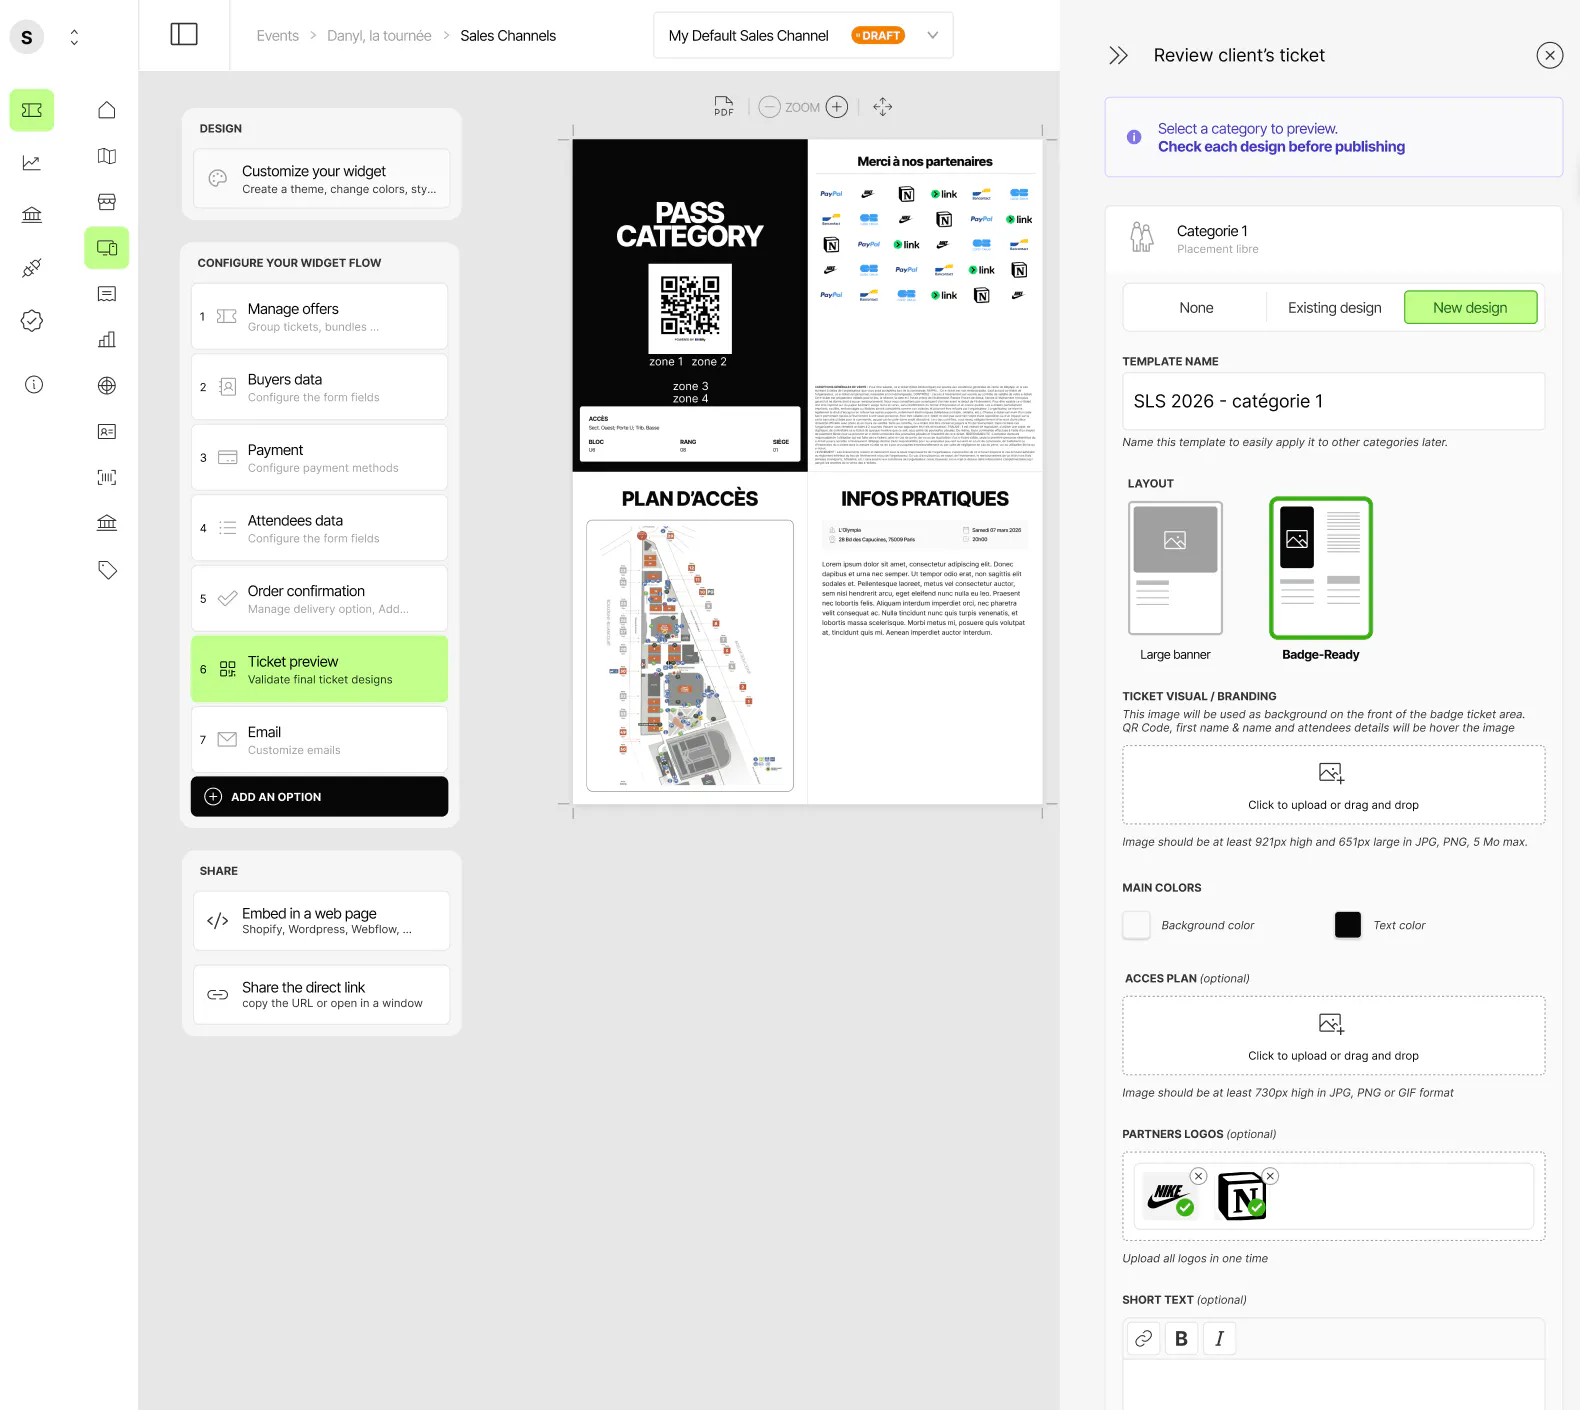

Open your event, go to Sales Channels, then navigate to the Configure your widget flow tab. Click on Ticket Preview and select the category you want to customize.
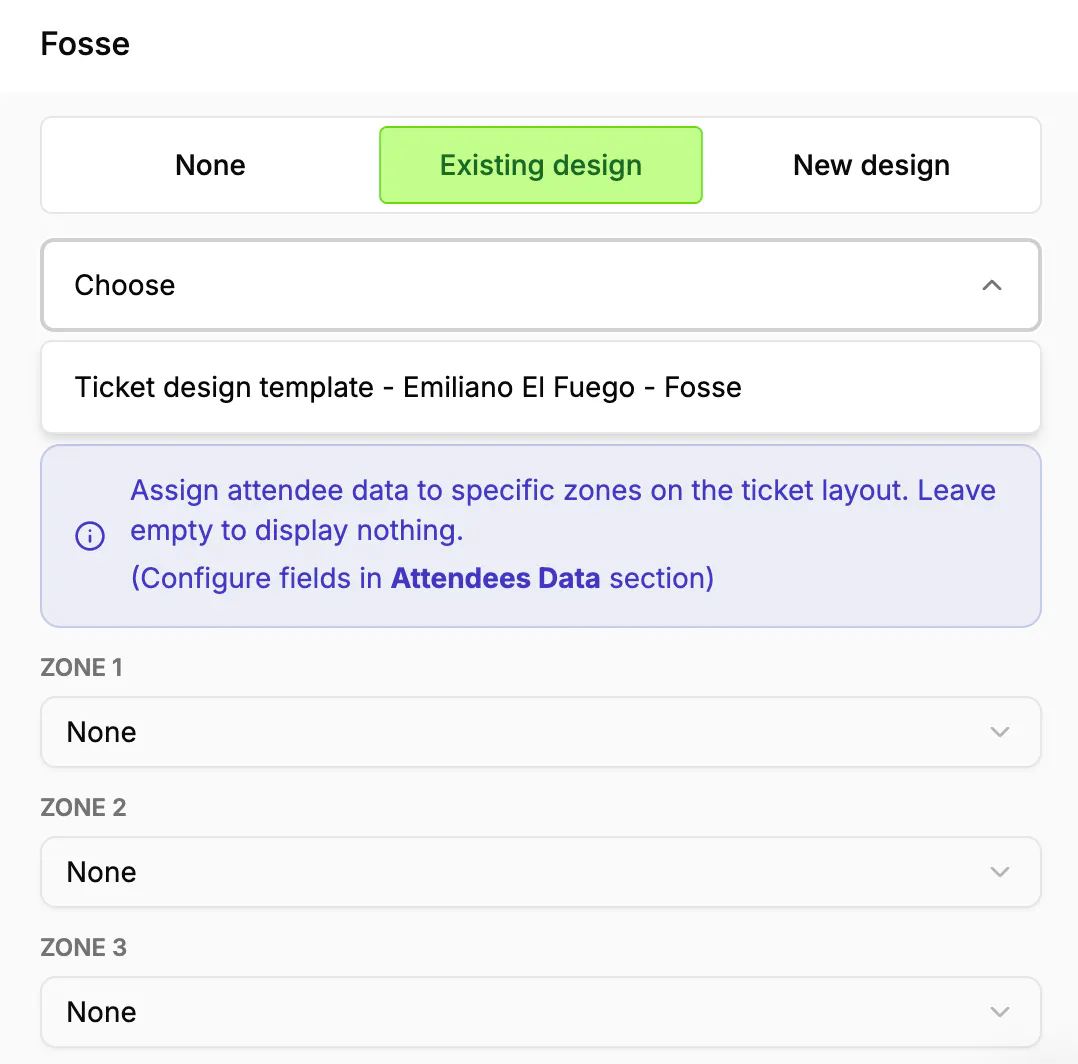
For each category, you'll see three options: None (no custom design), Existing design (apply a saved template), or New design (create one from scratch).

2. Creating a New Ticket Design
When you select New design, you'll configure the following settings:
- Template Name: a clear, descriptive name to easily find and reuse the template later.
- Layout Selection: choose between Large Banner (prominent visual, recommended for most events) or Badge-Ready (compact format for badge printing, with a short text field).
- Ticket Visual / Branding (optional): a background image for the front of the ticket, behind the QR code and attendee details. Min 921×651px, max 5MB, JPG/PNG/GIF.
- Main Colors: set a background color and text color to define the ticket's look.
- Access Plan (optional): a seating map or zone layout to help attendees locate their area. Min height 730px, max 5MB, JPG/PNG/GIF.
- Partner Logos (optional): upload sponsor or partner logos in one go, displayed grouped on the ticket. Same size/format restrictions.
- Short Text (Badge-Ready only): a brief message like "VIP Access – All Areas" or "Press Pass".
3. Saving and Applying Templates
Once your design is configured, click Save ticket design. Your template is now saved and ready to use.
To reuse it, select Existing design the next time you configure a category or event, and choose your saved template from the dropdown.
4. Assigning Attendee Data to Ticket Zones
When you apply an existing template to a category, Billy lets you control exactly what attendee information appears on the printed ticket, and where.
Each ticket layout is divided into predefined zones (Zone 1, Zone 2, Zone 3). You can assign any attendee data field to each zone: name, email, or any custom field you've configured in your attendee form. If you leave a zone empty, nothing will be displayed there.
This means you can tailor the same template for different use cases. For example, a VIP badge might show the attendee's full name and company in Zone 1 and Zone 2, while a general admission ticket might only display the name in Zone 1 and leave the rest blank.
To configure which attendee fields are available for mapping, go to the Attendees Data section in your event settings. The fields you define there will appear as options when assigning data to ticket zones.

In Summary
Billy's ticket design system gives you complete creative freedom to build beautiful, branded tickets that reflect your event's identity, and once you've perfected a template, you can apply it across categories and events in seconds, saving time without sacrificing quality.