Set up access control
Create scanner accounts, authorize them on your sessions, pick a scan mode and sync your tickets before doors open.
Use Access control to decide who can scan tickets at your event and to give your staff the credentials they need. Scanner accounts belong to your organization and can be authorized on any of your events, and every scan feeds your live scan statistics. This is useful when you prepare your entrances before doors open, when you bring in temporary staff for a single event, or when you run several gates that each need their own login.
Creating scanner accounts
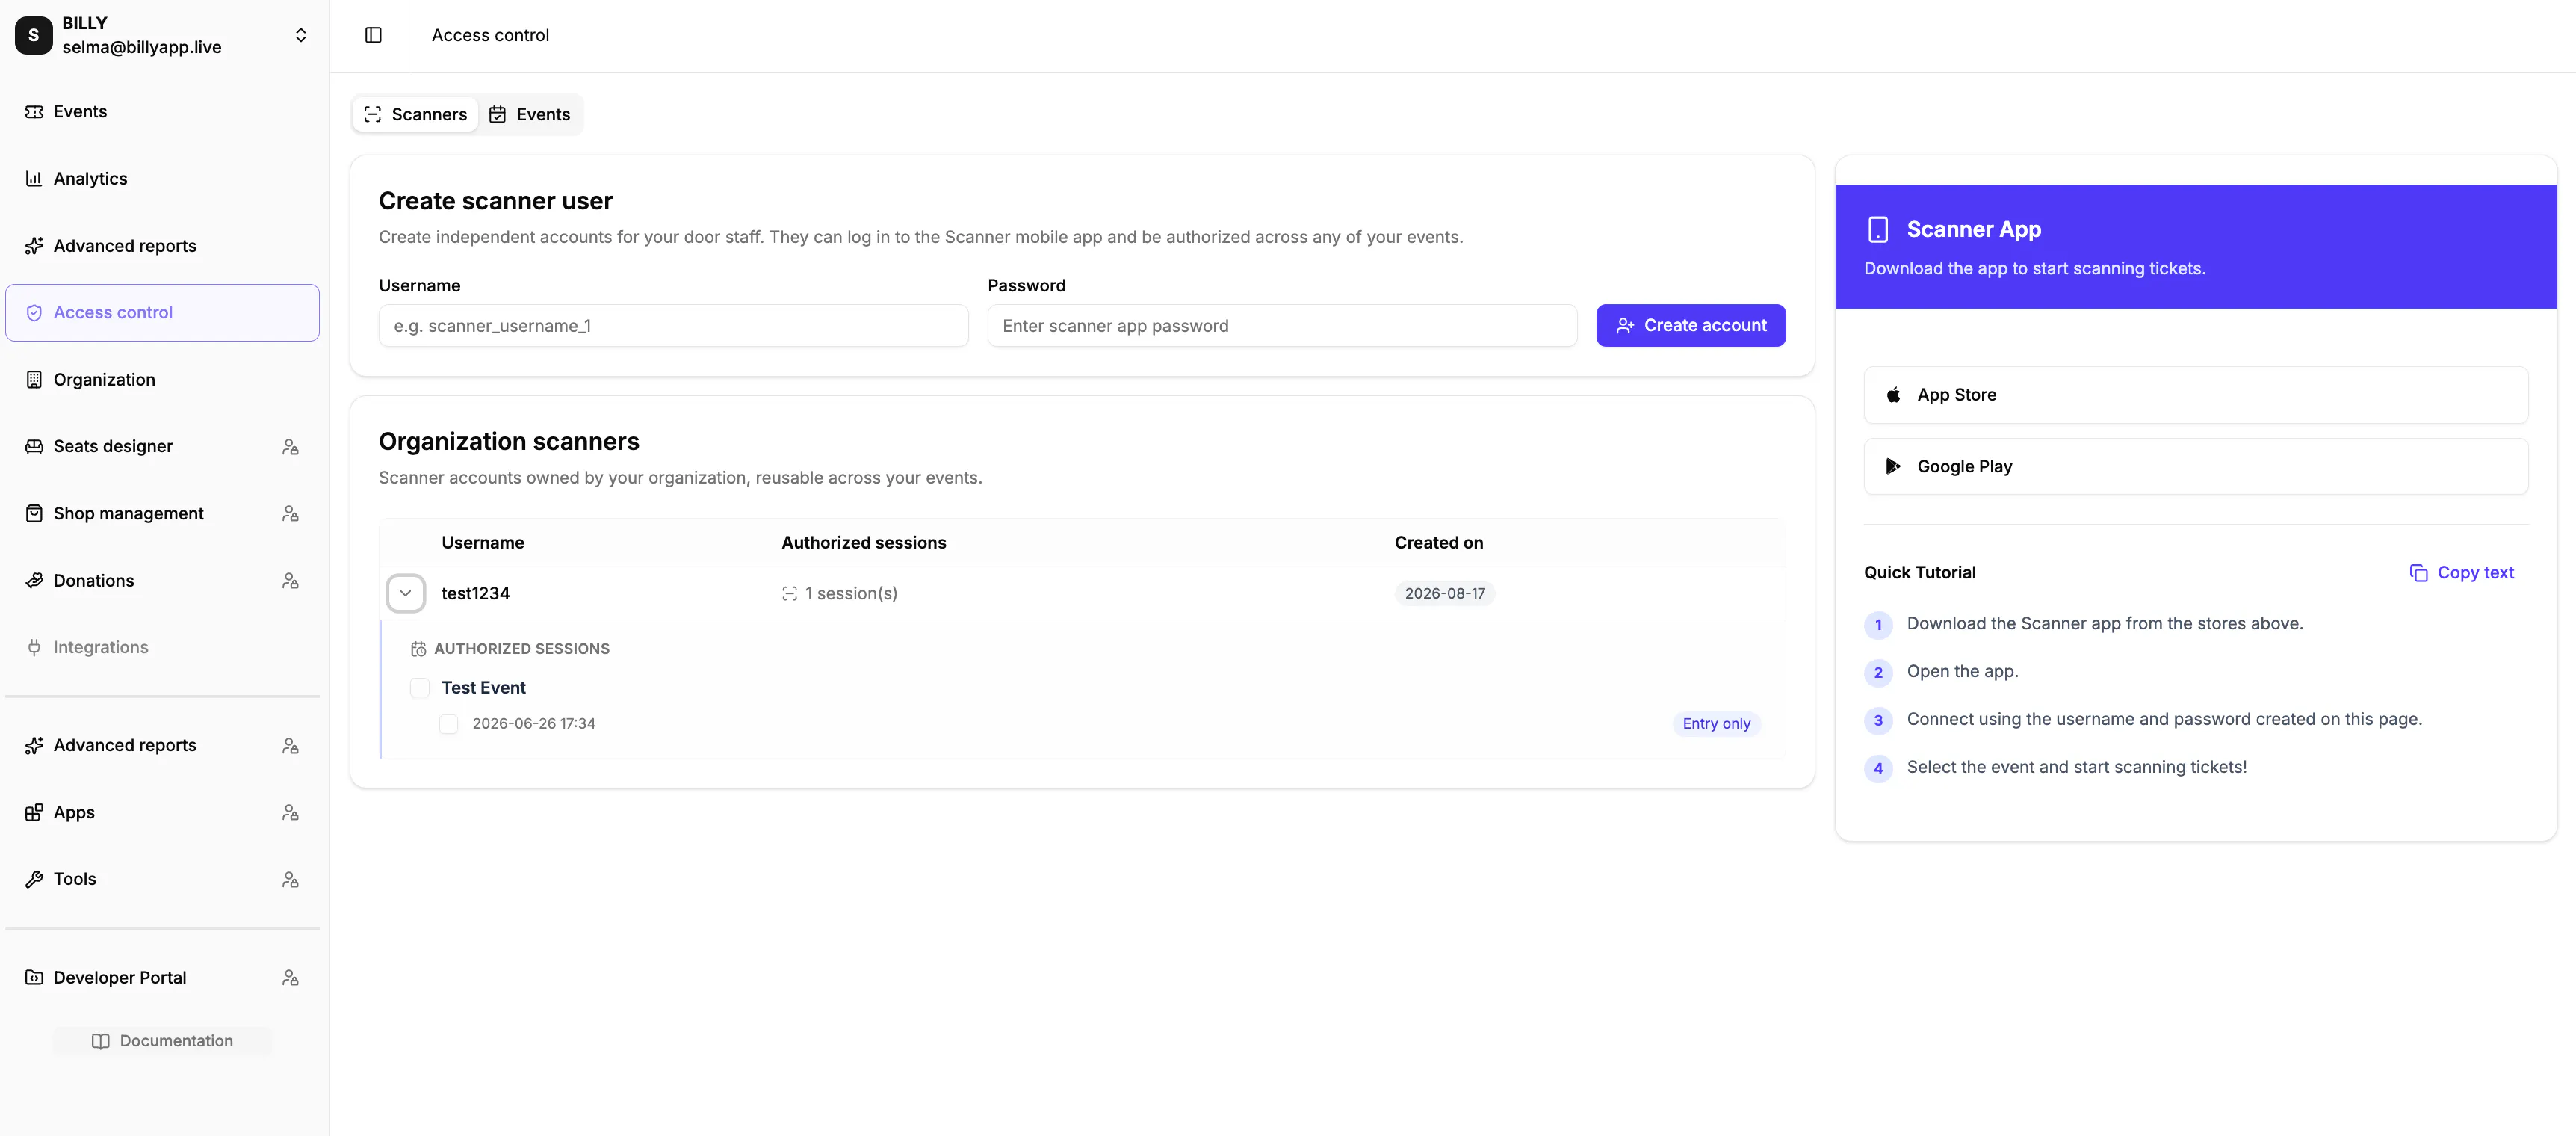
Open Access control and go to the Scanners tab. Under Create scanner user, enter a Username and a Password, then click Create account. These accounts belong to your organization and can be authorized across any of your events, so you create them once instead of per event. The Organization scanners table lists each account with its Authorized sessions and the date it was Created on, and View authorized sessions shows where an account may work.

Managing authorized scanners
On a single event, the Authorized Scanners list shows each account with its Username and the date it was Authorized on, and the bin icon on a row revokes that account for the event straight away. You can also work from the organization Access control page: remove a scanner from a session through View authorized scanners, or tick the accounts in the Scanners tab and use Revoke selected to withdraw several at once.
Enabling access control across sessions
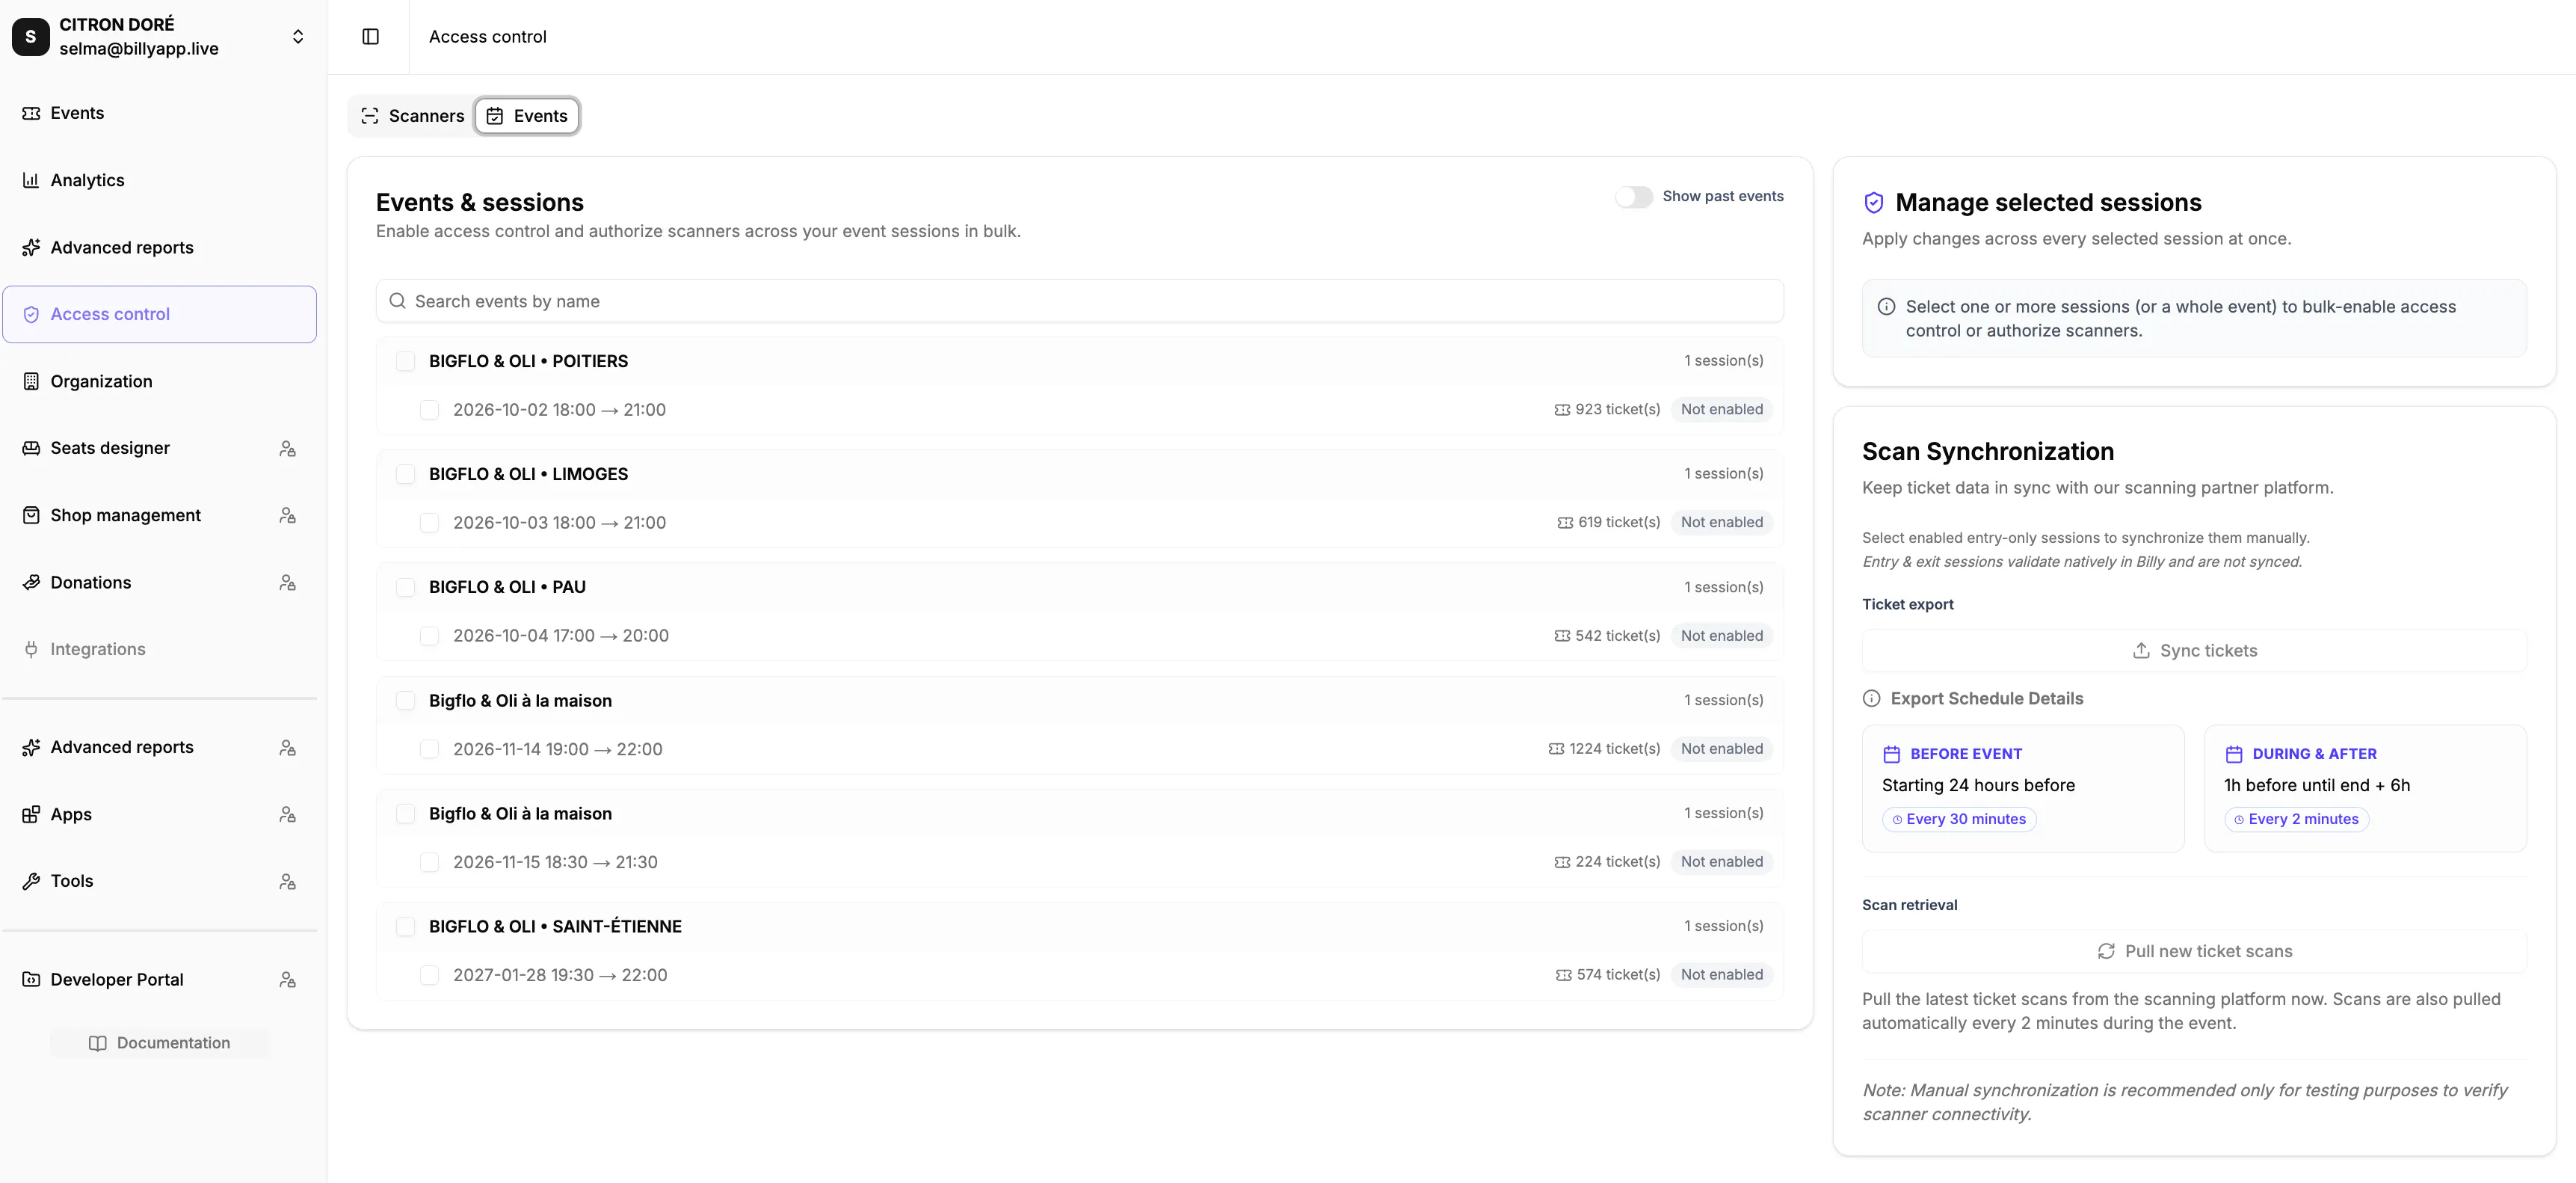
Go to the Events tab, which lists your Events & sessions. Select one or more sessions, or a whole event, then open Manage selected sessions to apply changes to everything you selected at once. Switch on Enable access control and click Enable on N session(s). Use Search events by name and Show past events to find what you need.

Authorizing scanners on sessions
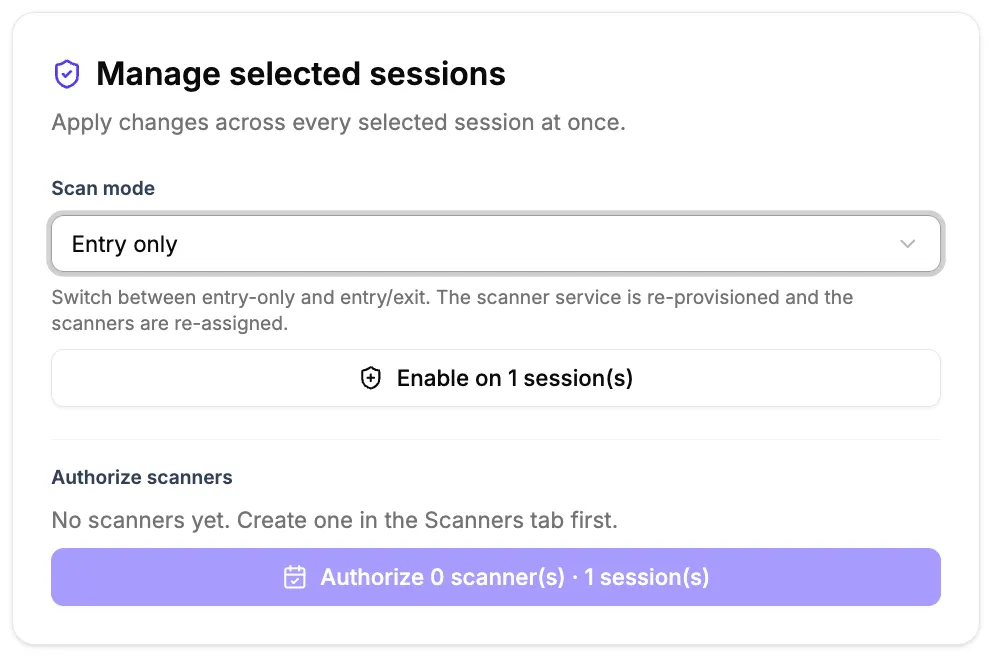
With your sessions still selected, pick the accounts under Authorize scanners and confirm. Billy tells you how many scanners were authorized across how many sessions. On a session, View authorized scanners lists who may work it and lets you remove one. In the Scanners tab, Revoke selected withdraws the authorizations of the accounts you tick.
Enabling access control on a single event
You can also work event by event. The event must have at least one session configured first. Open the event, go to its Access control page and toggle Enabled. A banner confirms Access control is active and shows your current Scan mode. Enable it only when you are ready, because access control cannot be turned off once activated, although you can still change the scan mode afterwards. Changes are applied instantly to all scanning devices.
Choosing the scan mode
Pick your Scan mode before you enable access control. Both modes scan the same tickets and feed the same statistics. What changes is how your doors behave, and what you have to prepare.
- Entry only. Each ticket is scanned once, on the way in. Once scanned, the ticket will not be valid anymore, and therefore will no longer validate scan, an error message will show “Ticket already scanned X seconds/minutes/hours/days ago”. Pick this for a standard event with a single entry.
- Entry & exit. Tickets are scanned on the way in and on the way out, if a ticket is scanned out, it can go back in. A Re-entry limit decides how many times a ticket may come back. Pick this when your audience leaves and returns, or when you need to know how many people are inside.
If you are unsure, take Entry only. It is the safest choice at the door, since it keeps working when the venue network does not.
You can change the mode later from Change scan mode. That re-provisions the scanner service and re-assigns your scanners, so active scanners may need to reopen the service: do it before doors open rather than during the event.

Setting a re-entry limit
On Entry & exit sessions, Re-entry limit caps how many times a ticket can come back in, counting each entry and exit as one cycle. Exiting is always allowed. Enter a whole number of 1 or more, or leave it blank for unlimited entries.
Syncing tickets and retrieving scans
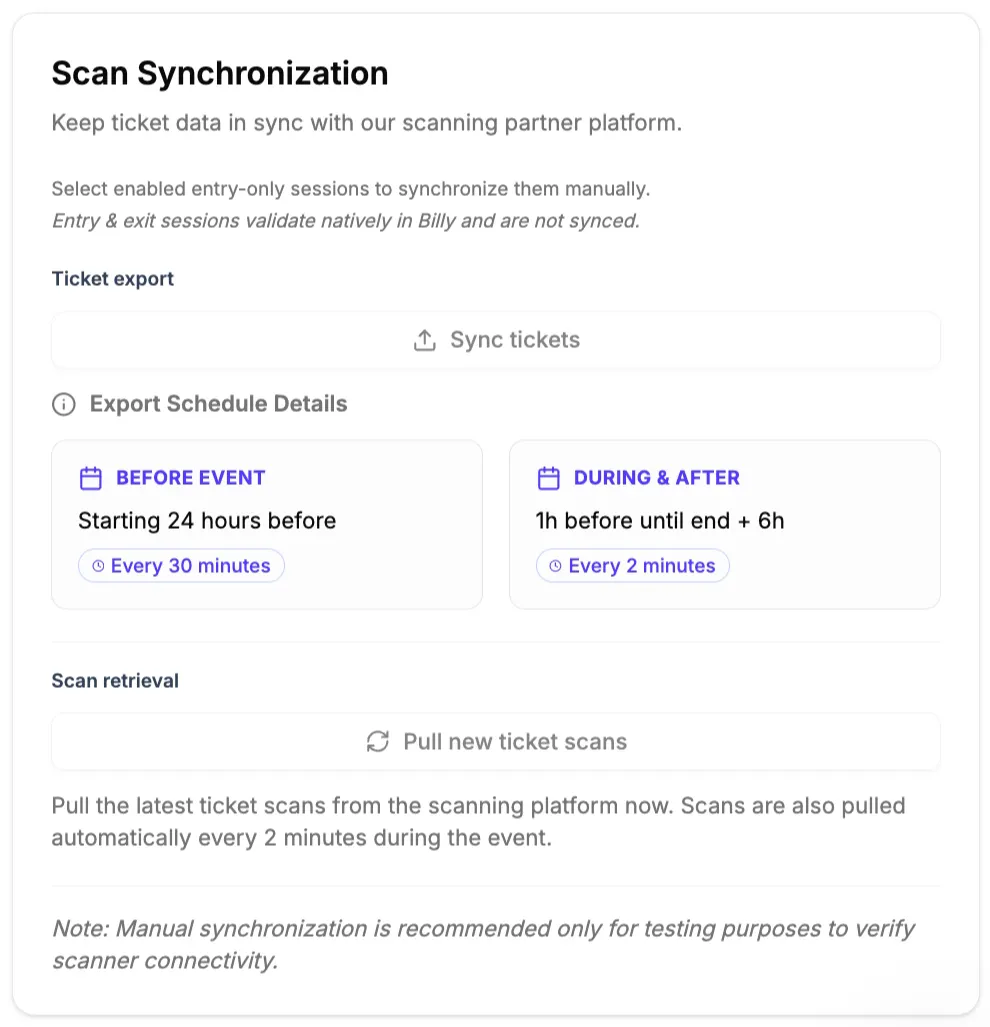
Entry only sessions need their tickets on the scanning platform, and Billy exports them automatically: every 30 minutes starting 24 hours before the event, then every 2 minutes from one hour before it starts until six hours after it ends. To export immediately, select the sessions and click Sync tickets. A Ticket export complete summary then shows, for each session, the Previously exported, Newly exported and Total tickets counts. Entry & exit sessions appear as No export needed, because their tickets are validated live against Billy's database. Scans come back automatically every 2 minutes during the event, and Pull new ticket scans fetches them straight away.