
Managing and Editing your Discounts
Discounts aren’t just about lowering prices, they’re one of the most powerful ways to drive sales, reward loyalty, and measure marketing performance.
Discounts aren't just about lowering prices, they're one of the most powerful ways to drive sales, reward loyalty, and measure marketing performance.
With Billy, you can easily create, organize, and analyze discounts to:
- Boost your conversion rate
- Reward VIPs and superfans
- Track partner and campaign performance across sales channels
Everything happens in one place: Billy Studio.
Create a Discount
- Go to Studio
- Select your event
- Click on Discounts in the left-hand menu
- You'll see all existing discounts for that event, and the option to Create Discount.
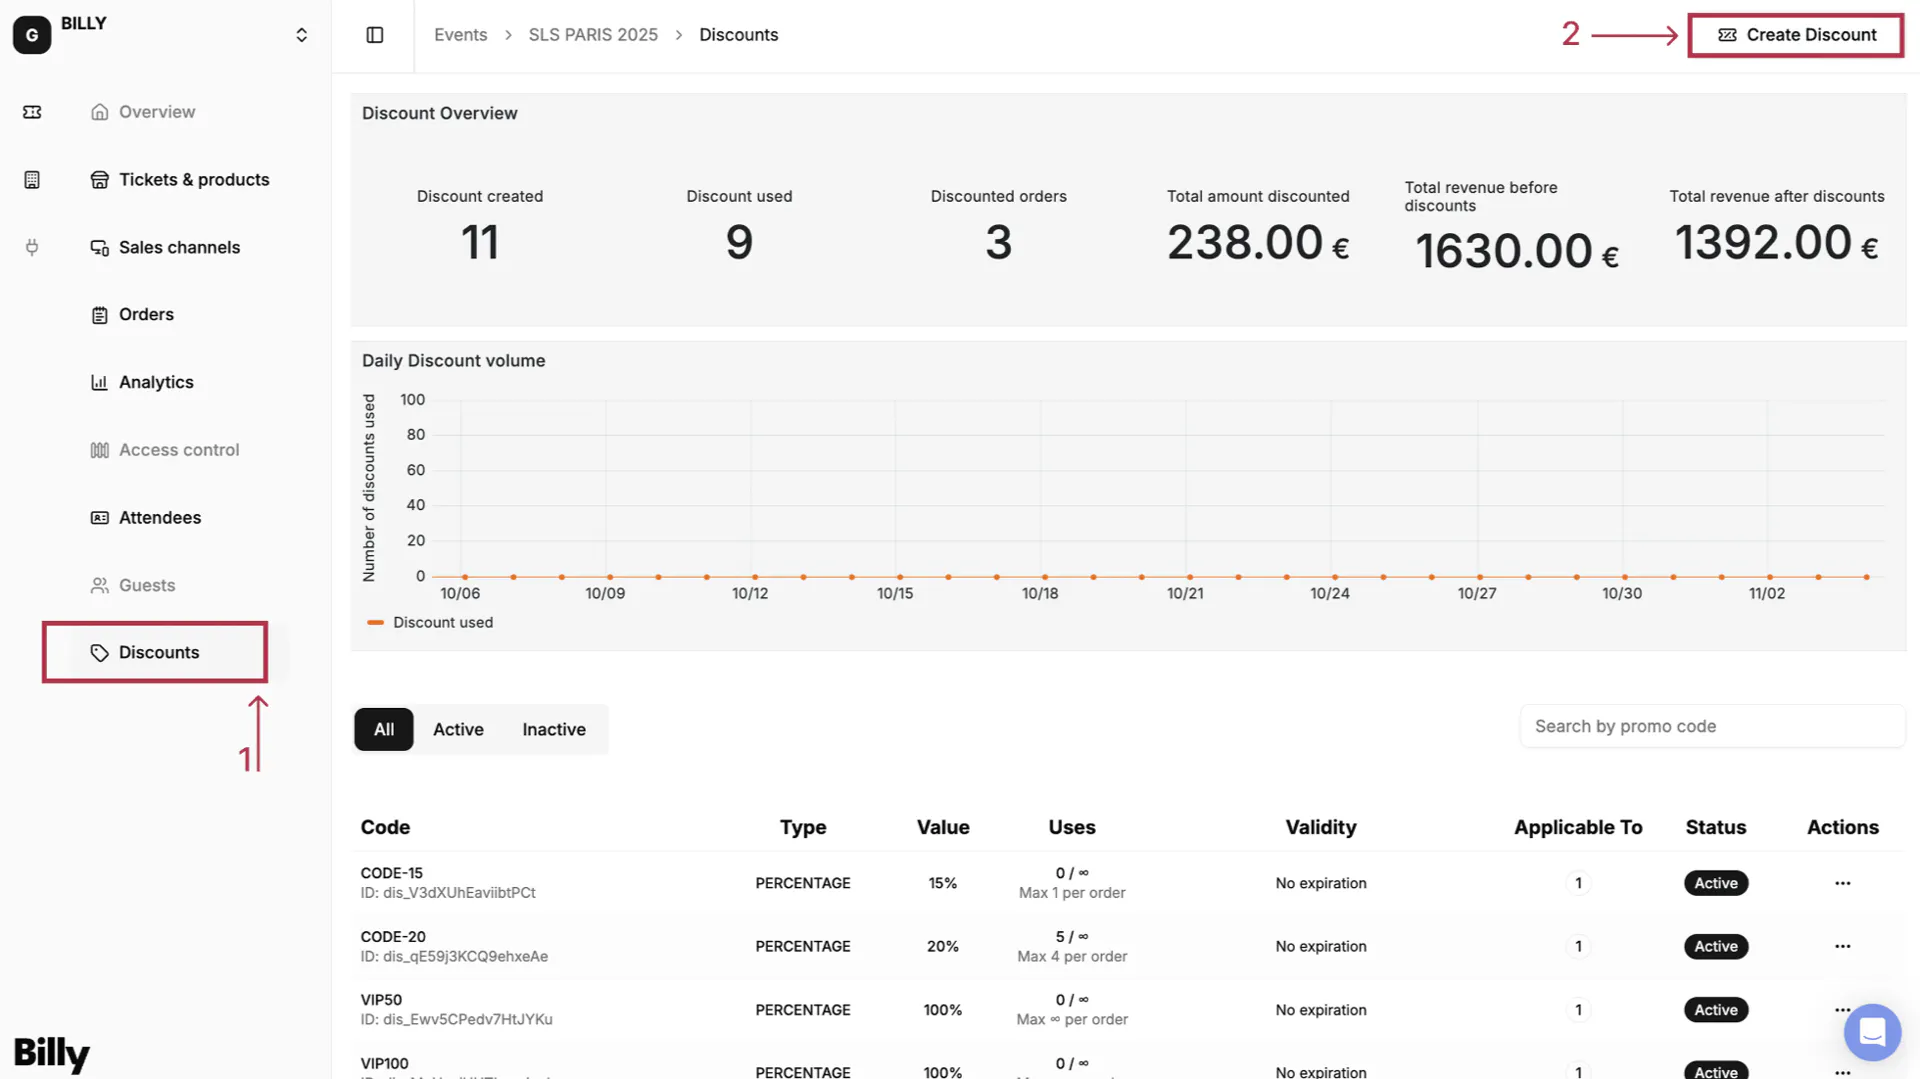

Here you will be presented with two options:
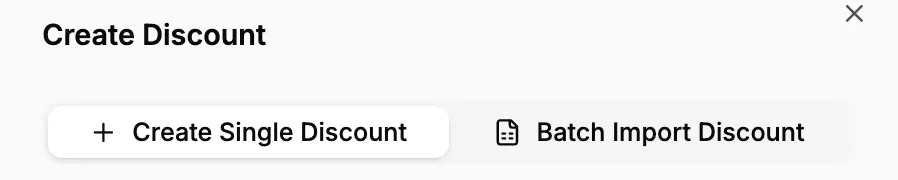

Option 1: Create single discount
This is the simple option, add one code at a time.
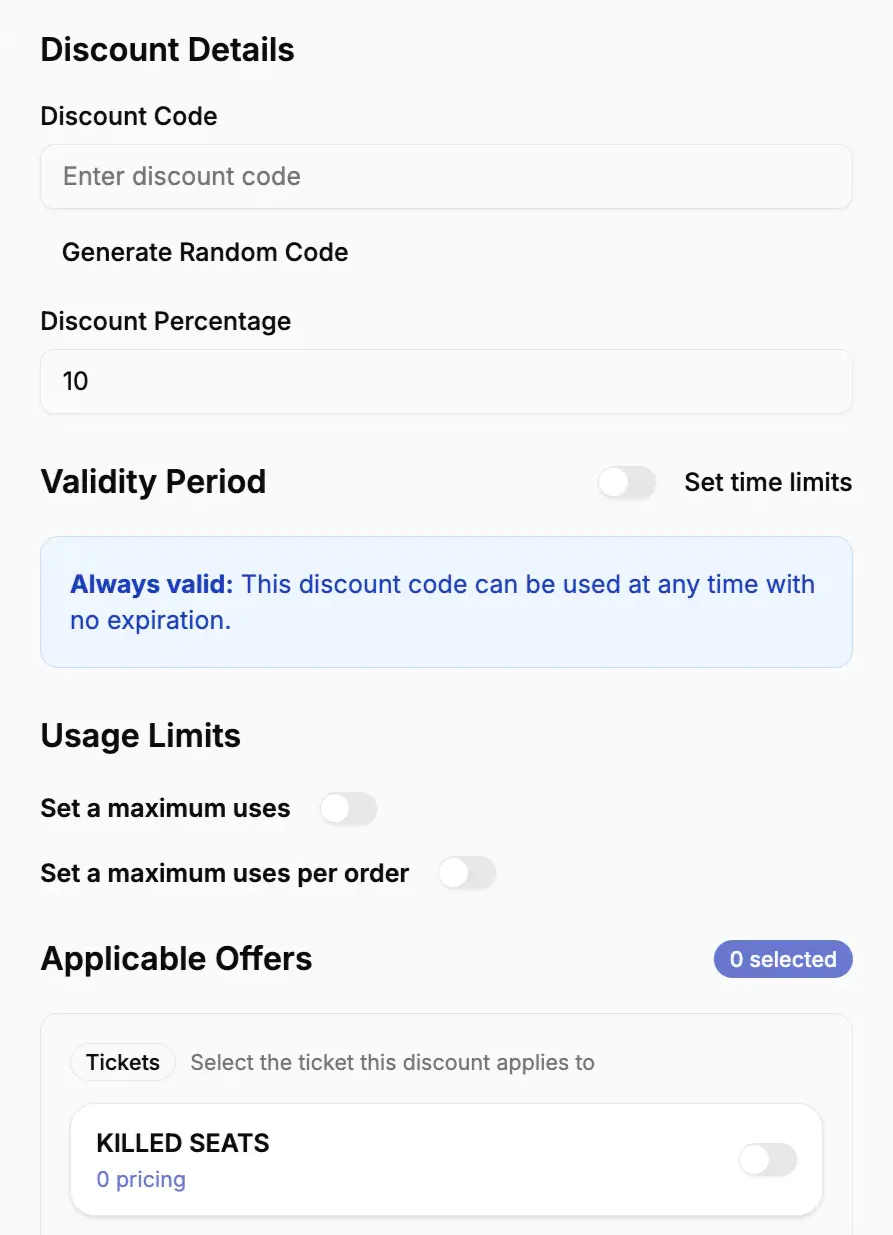

You need to fill in:
- Discount Code → the code your fans will enter at checkout. (Tip: you can type your own or let Billy generate one automatically).
- Discount Percentage → the value of the discount, e.g. 15% off.
- Validity Period → choose when the discount is active.
- Set a start date and end date
- Leave it blank → the code will be valid at any time, with no expiration.
- Usage Limits → decide how many times the code can be redeemed.
Maximum uses → the total number of times this code can be used, across all buyers combined.
Maximum uses per order → how many times a single buyer can apply this code within one order.
These two settings work together. Here's how to think about it:
Example 1: You want to offer 10% off to the first 100 buyers, but each person should only use it once. → Set Maximum uses = 100 and Maximum uses per order = 1. The code can be redeemed 100 times total, once per order. 100 different people can benefit from it.
Example 2: A sponsor needs to buy 6 tickets at once for their team, all with the discount. → Set Maximum uses = 6 and Maximum uses per order = 6. The code can be applied to 6 tickets, and a single buyer can use all 6 in one order.
Example 3: You want to give a code for 6 free tickets (100% discount), but each person should only get 1 free ticket per order — so the code must be used across 6 separate orders. → Set Maximum uses = 6 and Maximum uses per order = 1. The code works 6 times total, but only once per order. This means 6 different people (or 6 different orders) can each get 1 free ticket.
💡 Key takeaway: Maximum uses is the overall budget of your code. Maximum uses per order controls how much of that budget a single buyer can consume at once.
- Offers → select which tickets or products this discount applies to.
✅ When finished, click Create Discount!
Option 2: Batch import discount (CSV)
If you need to create many discount codes at once, use the CSV import for faster setup.
It's perfect for:
- Partner-specific promo codes
- Newsletter or fan club campaigns
- Large marketing pushes like Black Friday
CSV Format Requirements:
| Column | Description |
|---|---|
discount_code | Unique code for each discount |
percentage | Discount percentage (e.g. 10 = 10%) |
applicability_start_date | (Optional) Start date – YYYY-MM-DD |
applicability_end_date | (Optional) End date – YYYY-MM-DD |
max_uses | (Optional) Max number of times the discount can be used |
max_uses_per_order | (Optional) Max uses per single order |
After uploading:
- Select which offers the discounts should apply to
- Click Import Discounts ✅
💡 Tip: Batch import saves time when generating hundreds of unique codes for partners or campaigns.
Understanding the Discounts Dashboard
The Discounts Dashboard gives you a complete view of all your discount codes, their performance, and their impact on your event's sales.
It's the best place to create, track, and analyze your promotions, all in one place.
🎯 Discount Overview
At the top of the dashboard, you'll find a quick summary of your discount performance:


| Metric | Description |
|---|---|
| Discounts created | Total number of discount codes you've made for this event. |
| Discounts used | Number of codes that have been redeemed by buyers. |
| Discounted orders | Number of orders where at least one discount was applied. |
| Total amount discounted (€) | The total value of all discounts applied to purchases. |
| Total revenue before discounts (€) | The gross revenue before applying discounts. |
| Total revenue after discounts (€) | The net revenue after discounts were applied. |
💡 Tip: This section helps you instantly see the real impact of your discounts — how much you've given away vs. how much additional revenue or engagement they've generated.
📊 Daily Discount Volume
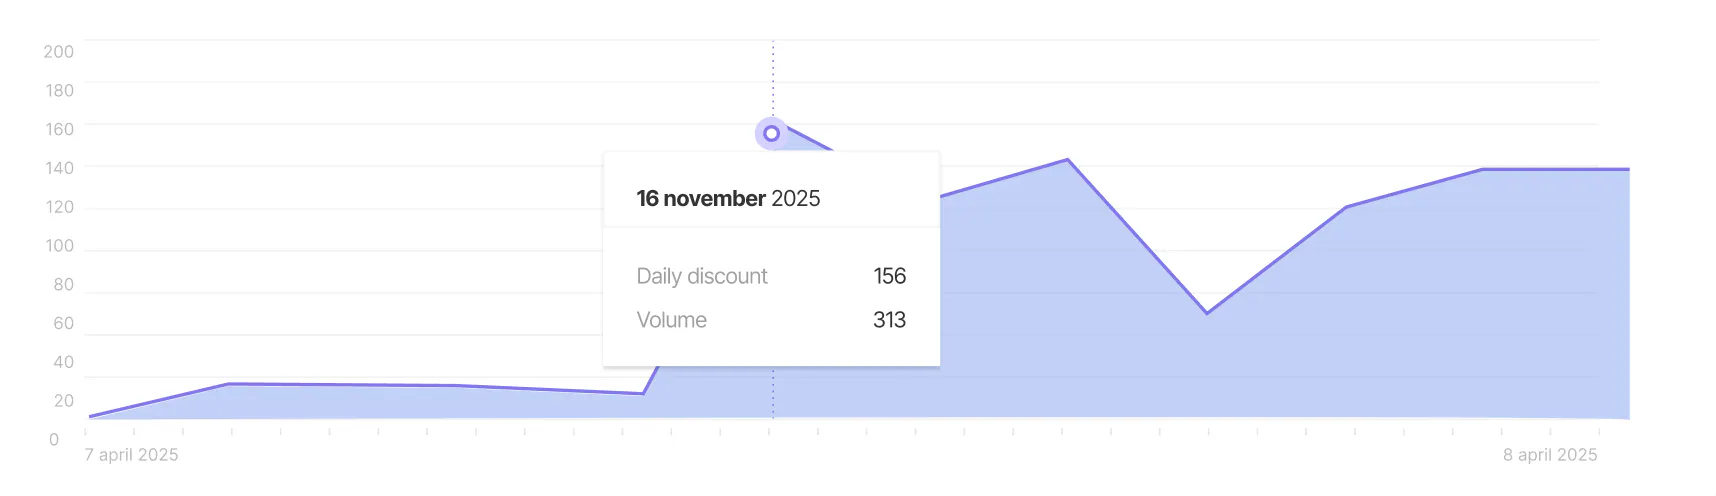

The Daily Discount Volume chart shows how many discounts were used each day.
Use it to:
- Identify sales peaks after campaigns or promotions.
- Track engagement over time (for example, if a flash sale created a spike).
- Compare different marketing periods to see what works best.
Hover over any point in the graph to see exact daily numbers.
🧾 Manage Your Discounts
Below the analytics, you'll see a table with all your active, inactive, and expired discounts.
Each line gives you a full overview of how each code performs.
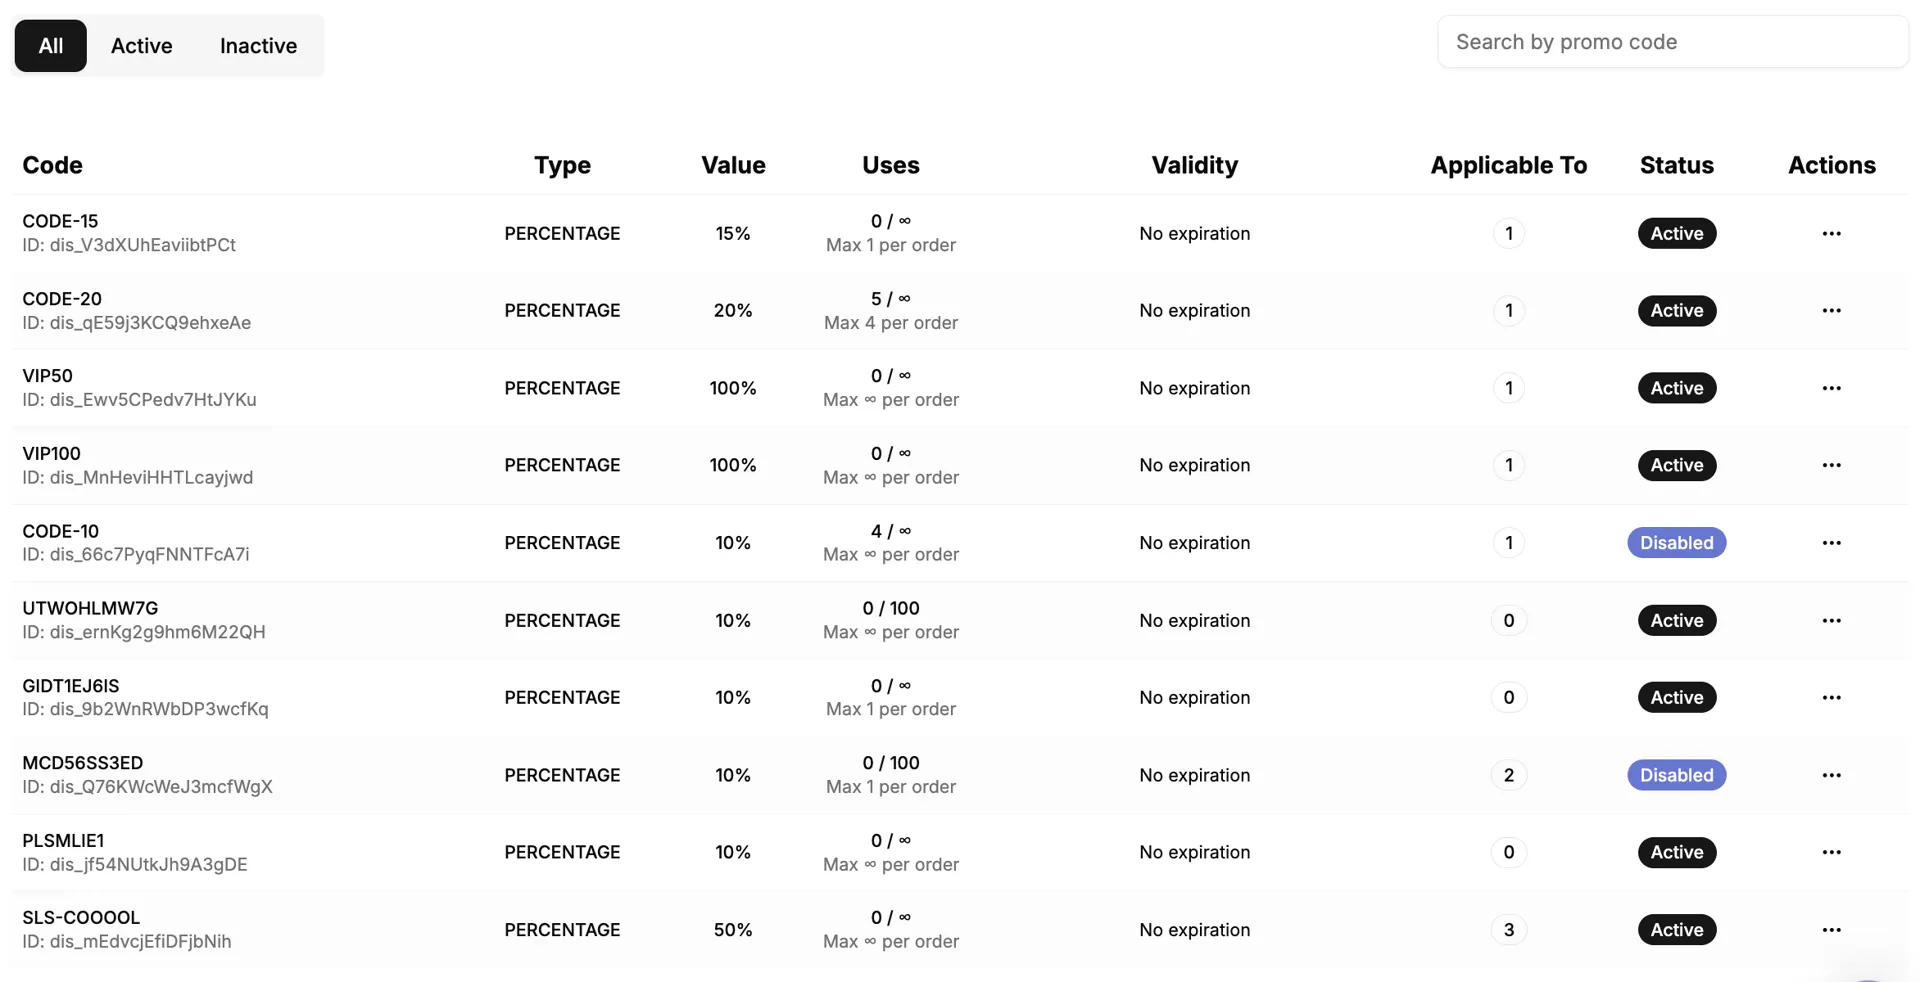

Each discount line displays the following key stats:
| Column | Description |
|---|---|
| Code | The promo code name (e.g. VIP50, EARLYBIRD10) |
| Type | Discount type: currently percentage-based |
| Value | The amount of reduction (e.g. 10%, 50%) |
| Uses | How many times the code has been redeemed vs. its total allowed uses |
| Validity | Shows the start date and end date of the discounts, or "No expiration" |
| Applicable To | How many offers or tickets the discount is linked to (e.g. Category 1 and Category 2) |
| Status | Active, Disabled, or Expired |
💡 Search tip: Use the search bar (search by promo code) to quickly find a specific code by name or ID. Or filter in case you want to check active or inactive codes.
Manage Actions
From the Actions menu (three dots on the right of each row), you can:
- ✏️ Modify → update discount details or limits.
- 🚫 Disable → temporarily deactivate a code.
- 🗑️ Archive → permanently remove a code.
Changes are applied instantly and synced across all connected Sales Channels.
How to Use This Data
- Monitor performance → spot which campaigns or codes drive the most redemptions.
- Compare usage → identify which sales channels or audiences respond best to discounts.
- Optimize future campaigns → increase usage limits or extend popular promotions.
- Track partner results → if you've shared codes with partners or sponsors, you can see exactly how many sales they generated.
How Discounts Work in Sales Channels & Widgets
When you create a discount in Studio, you can choose which sales channels (shops or widgets) it applies to.
Here's what your fans will see:
- Discount field at checkout: Fans can enter a discount code you've shared in emails, social media, or partner campaigns.
- Real-time price update: Once applied, the price updates instantly, fans see the original price crossed out and the discounted total before payment.
💡 Organizer Tip:
Use discounts to shape different experiences per channel. For example:
- 🎟️ "EARLYBIRD10" → shared on Instagram to give 10% off for the first 100 buyers.
- 💌 "SUPERFAN20" → sent only to newsletter subscribers for exclusive access.
- 🤝 "PARTNER25" → given to a sponsor so they can share a unique 25% code with their followers.
👉 With Billy, you don't just create discounts, you measure their real impact on your event's growth and sales performance.