
Integrate Billy Widget on Your Website
Embed the Billy checkout widget on any website, either inline or in a dialog.
What is a widget?
A widget is a small, self-contained piece of code that can be easily integrated into your website to add specific functionality without requiring significant development work.
With Billy's widget, fans can buy tickets directly on your website, no redirects, no friction.
Why choose Billy's widget?
Billy's widget is built for speed, flexibility, and ease of use.
Quick to set up on Webflow, WordPress, or Shopify, Billy's widget makes checkout smoother and boosts conversions.
It's fast, secure, and user-friendly, fully integrated into your site.
Before starting …
Where to Find Your Sales Channel ID
Publish your Sales Channel first
Important: You will NOT see a Sales Channel ID until your Sales Channel is published. If it's still in draft, the link and ID won't exist yet.
Open your Sales Channels
- Go to Studio → Event → Sales Channels
- Select the channel you want to use
- Scroll down to the bottom and click the Share button
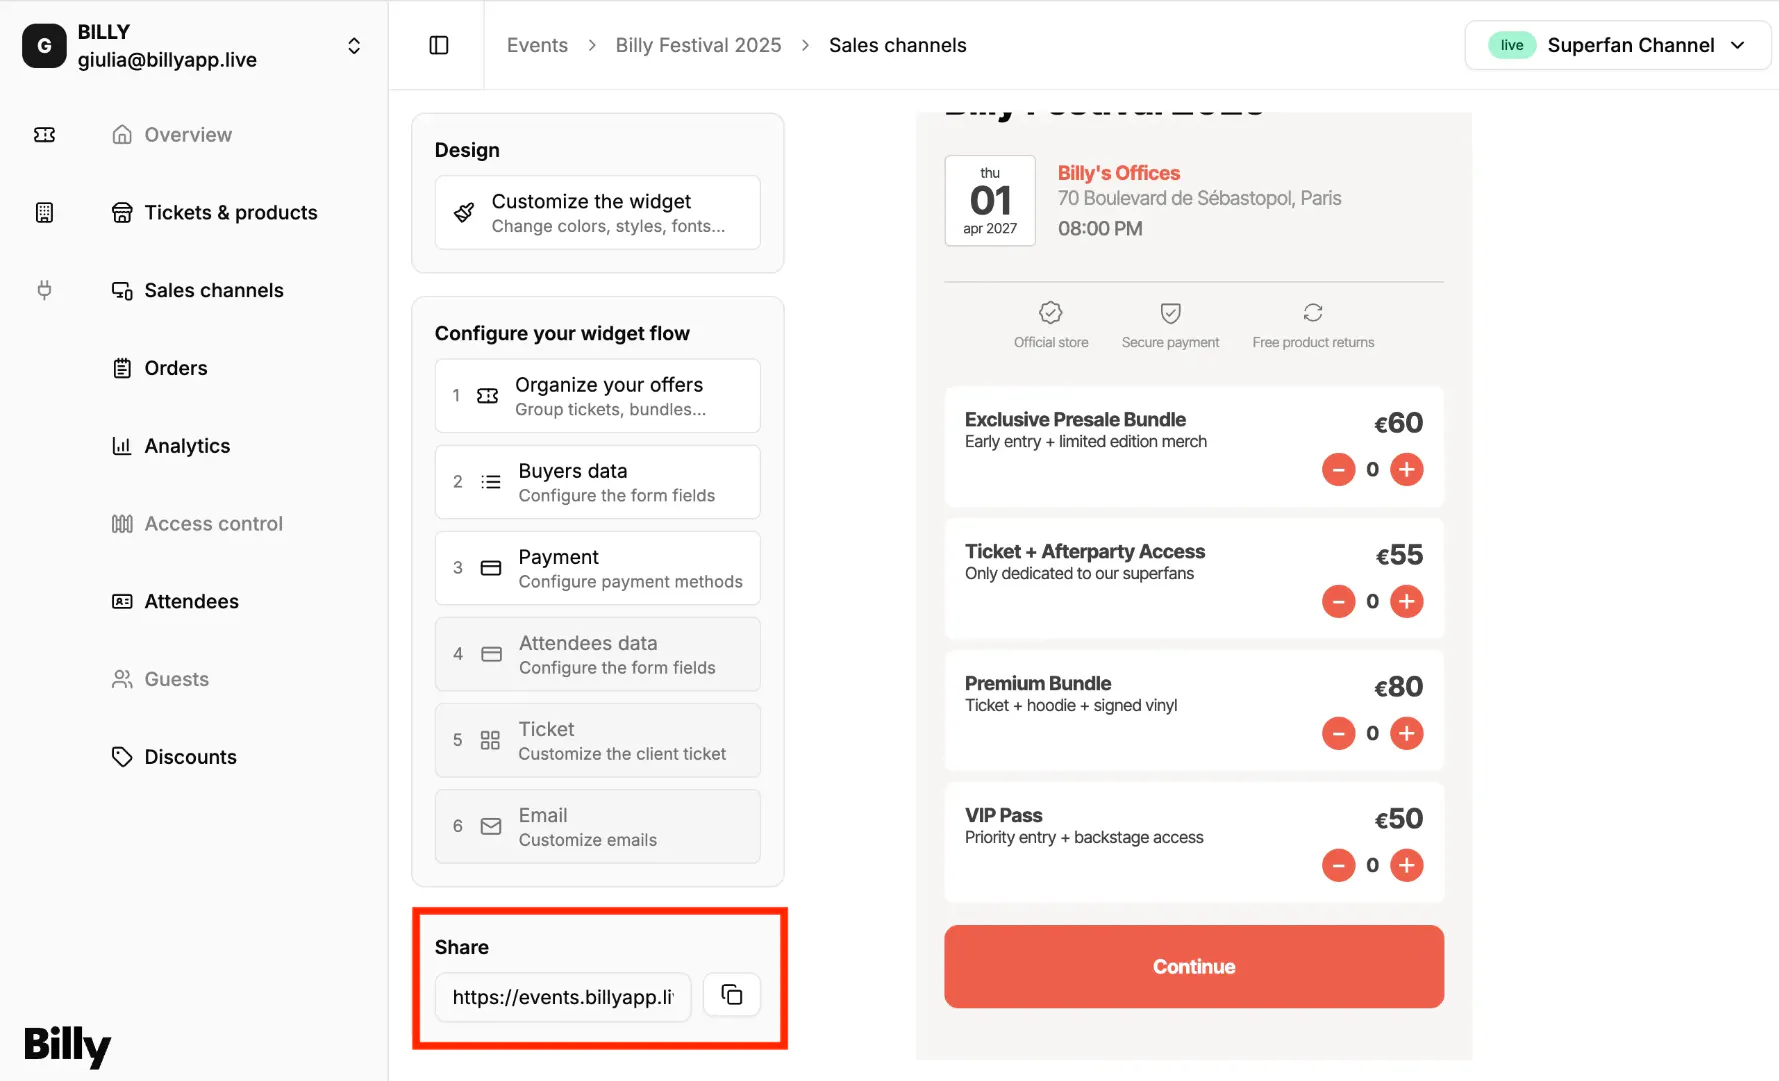

Extract your Sales Channel ID
- The Sales Channel ID is simply the long code at the end of the URL.
- Example URL:
https://events.billyapp.live/12b8b09a-eb23-4d65-ba92-f6059cb18648→ Here,12b8b09a-eb23-4d65-ba92-f6059cb18648is your Sales Channel ID.


Mandatory script
First, you need to integrate the script that is used to create the modals for your event(s), or to manage the iframe you add in your document.
<script type="text/javascript" defer src="https://events.billyapp.live/embed.js"></script>In the examples below, you always need to replace YOUR_SALES_CHANNEL_ID with the ID provided by Billy for your distribution channel.
Option 1: Embed your widget directly inside your webpage
If you want to embed our widget directly in your page, you just have to create an iframe, without forgetting to add the mandatory <script> in your webpage.
<iframe src="https://events.billyapp.live/YOUR_SALES_CHANNEL_ID" width="100%" height="500px" style="border:0;"></iframe>The <script> mentioned above will take care of updating the dimensions of the iframe on page change inside the widget, and make sure that everything is connecting between your webpage and the widget.
Option 2: Widget in a dialog (after clicking a button)
You can create a trigger to open the modal in two different ways:
- Using a normal link with an
<a>tag:
<a href="https://events.billyapp.live/YOUR_SALES_CHANNEL_ID">
  Open Billy Event in a dialog
</a>- Using a
<button>:
<button aria-haspopup="dialog" aria-controls="billy-dialog-YOUR_SALES_CHANNEL_ID" aria-expanded="false">
  Open Billy Event in a dialog
</button>
If you go with the button, we use attributes to trigger the modal opening. You need to create an HTML element with those attributes:
aria-haspopup="dialog"aria-controls="billy-dialog-YOUR_SALES_CHANNEL_ID"aria-expanded="false"
And that's it!
Customize the dialog
If you want, you can customize a few things about the modal. Here are the CSS variables available and their default values:
--billy-dialog-overflow-background-color: rgba(0, 0, 0, 0.8);

--billy-dialog-container-width: calc(100vw - min(10vh, 100px));
--billy-dialog-container-height: calc(100vh - min(10vh, 100px));
--billy-dialog-container-max-width: 1280px;

--billy-dialog-radius: 8px;
--billy-dialog-close-top: 6px;
--billy-dialog-close-right: 6px;
--billy-dialog-close-size: 26px;
--billy-dialog-close-color: #fff;
--billy-dialog-close-background-color: rgba(0, 0, 0, 0.5);
--billy-dialog-close-radius: 0px;
You have to set those in your website CSS file, or directly with inline styles on your <html> or <body> tag.
Full example
<iframe src="https://events.billyapp.live/6c3259a0-e1e4-4b69-9d8a-40dffa97d171" width="100%" height="600px" style="border:0;"></iframe>
<script type="text/javascript" defer src="https://events.billyapp.live/embed.js"></script>