
Embed Widget on Webflow
Add the Billy checkout to a Webflow site, either embedded on a page or opened in a pop-up.
Got a website built with Webflow? Great news, adding your Billy checkout to it is quick and easy!
Billy's widget lets your fans buy tickets directly on your site, no redirects, no confusion, no tech headaches.
You can choose between two simple options
Option 1: Embedded Checkout
The Billy checkout appears directly inside your event page, so fans can browse and buy tickets in one place.
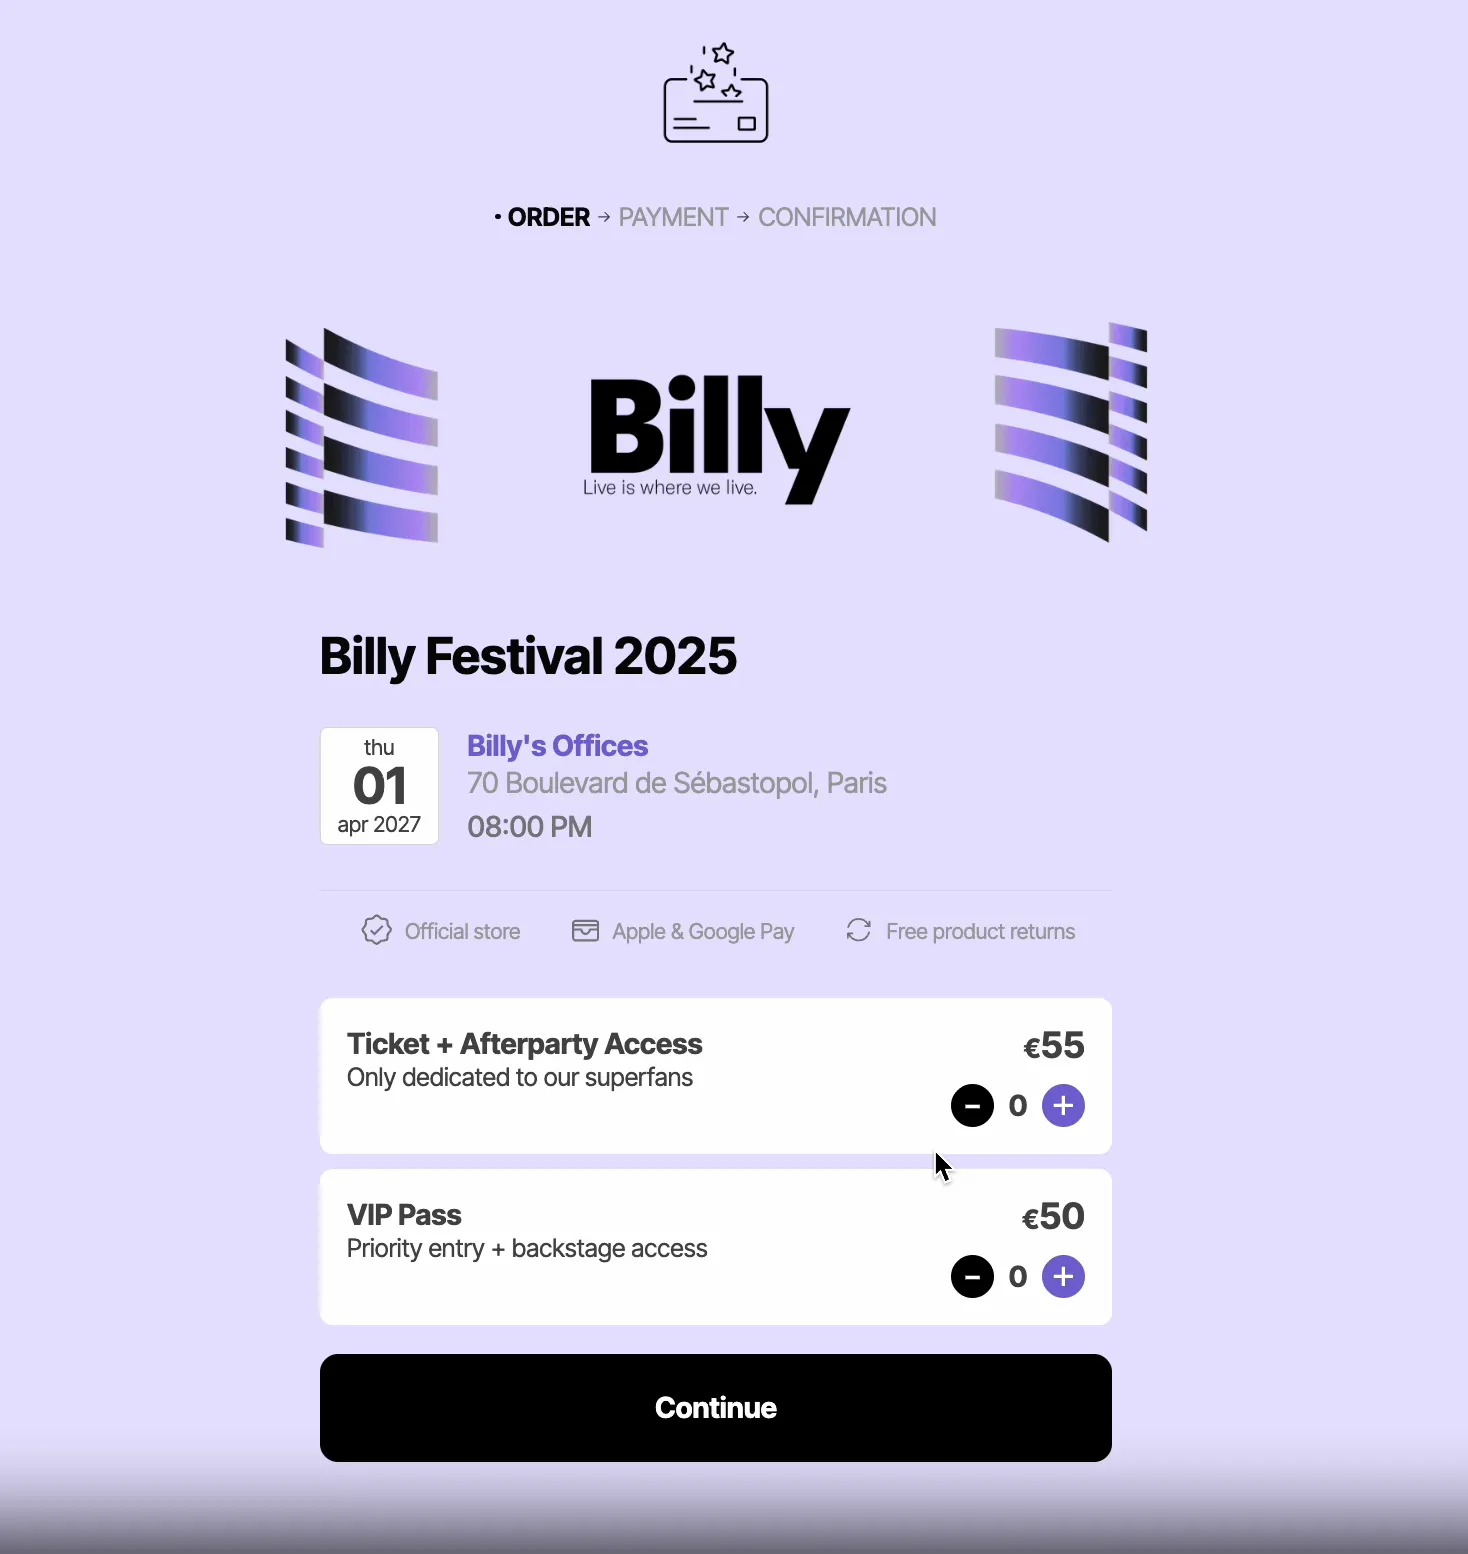

Option 2: Pop-up window
The Billy checkout opens in a clean pop-up window when visitors click your "Buy Now" button, perfect for keeping your page layout simple.
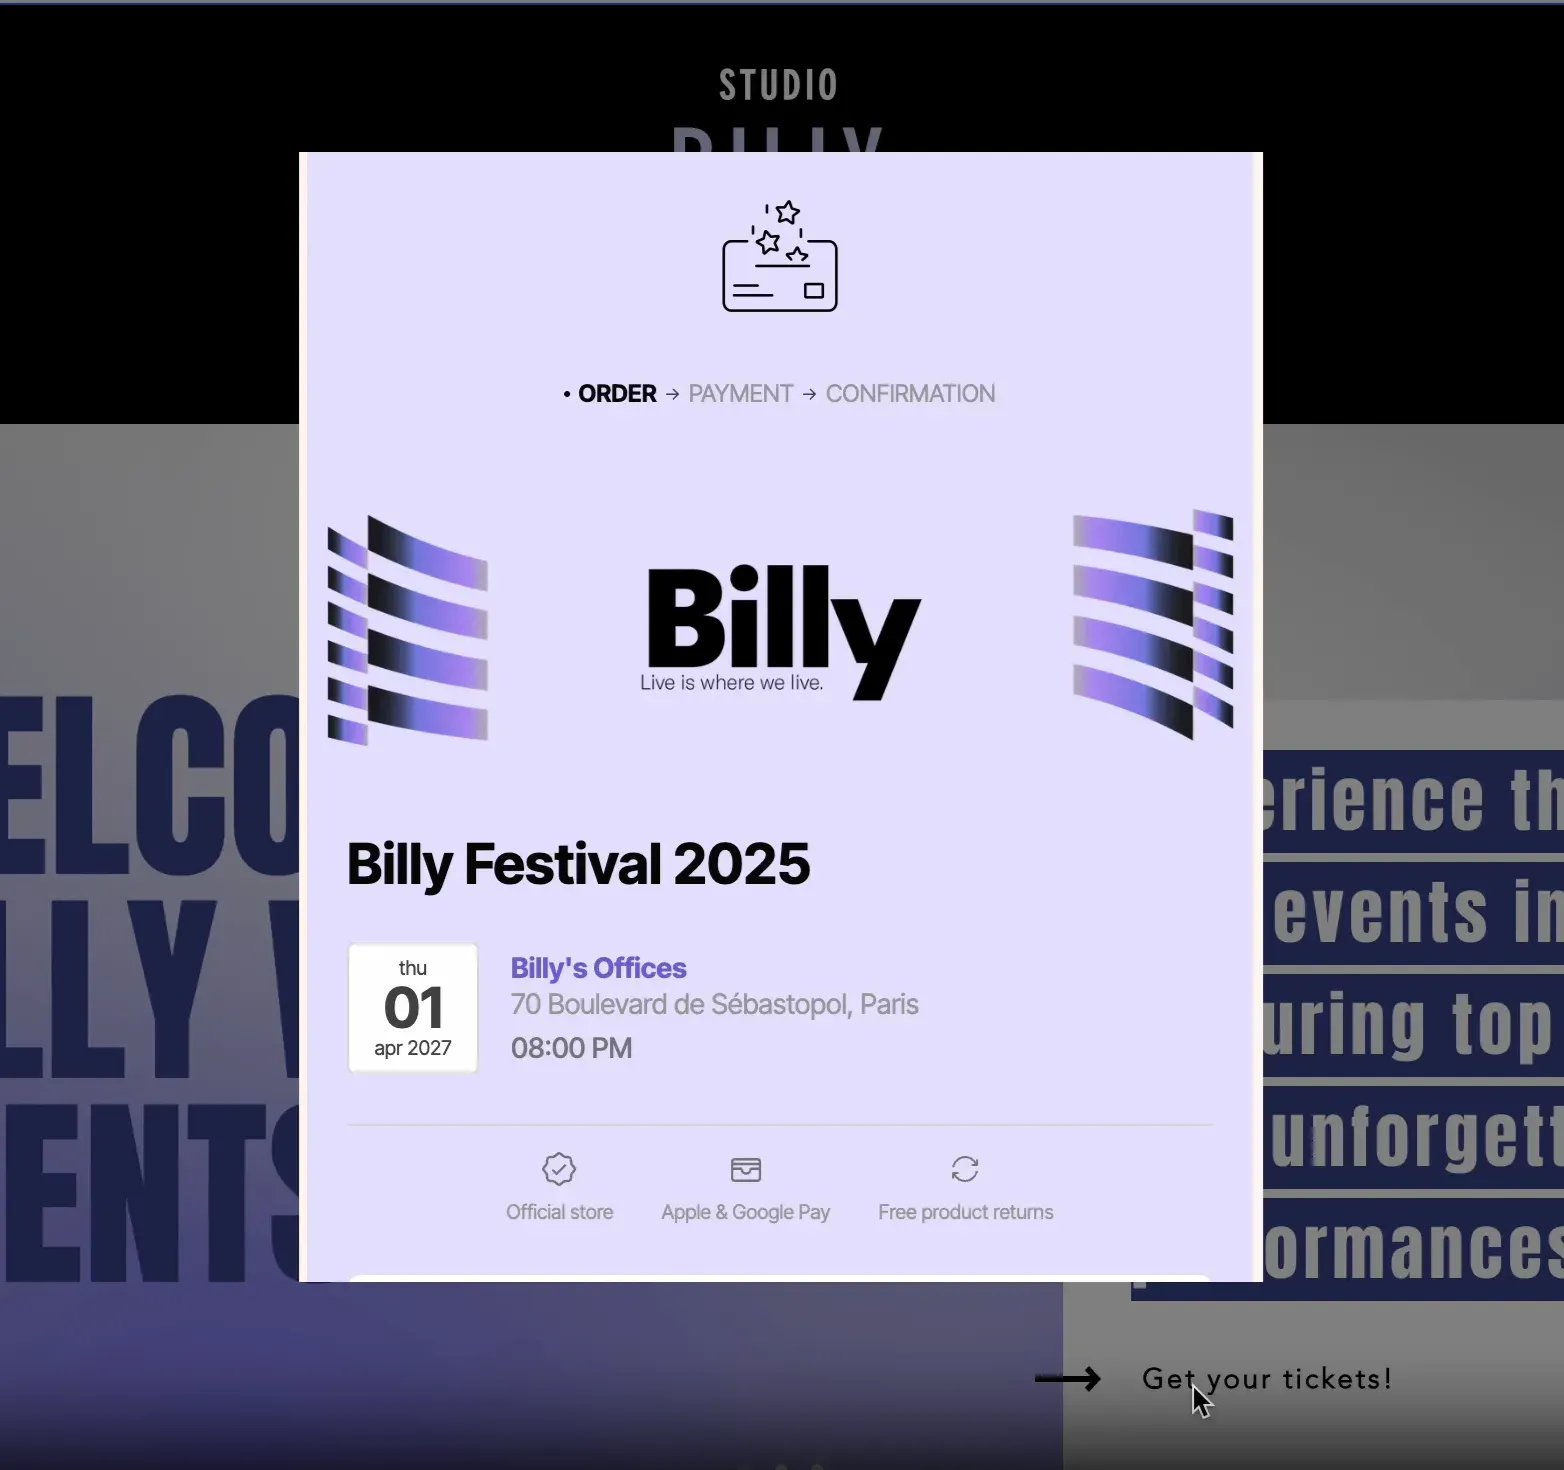

No matter which option you choose, fans can complete their purchase without leaving your website.
That means:
- A smoother checkout experience
- Higher conversion rates
- A stronger, more professional brand image
Ready to set it up? Let's go, it only takes a few minutes.
Before getting started …
Where to Find Your Sales Channel ID
Publish your Sales Channel first
Important: You will NOT see a Sales Channel ID until your Sales Channel is published. If it's still in draft, the link and ID won't exist yet.
Open your Sales Channels
- Go to Studio → Event → Sales Channels
- Select the channel you want to use
- Scroll down to the bottom and click the Share button
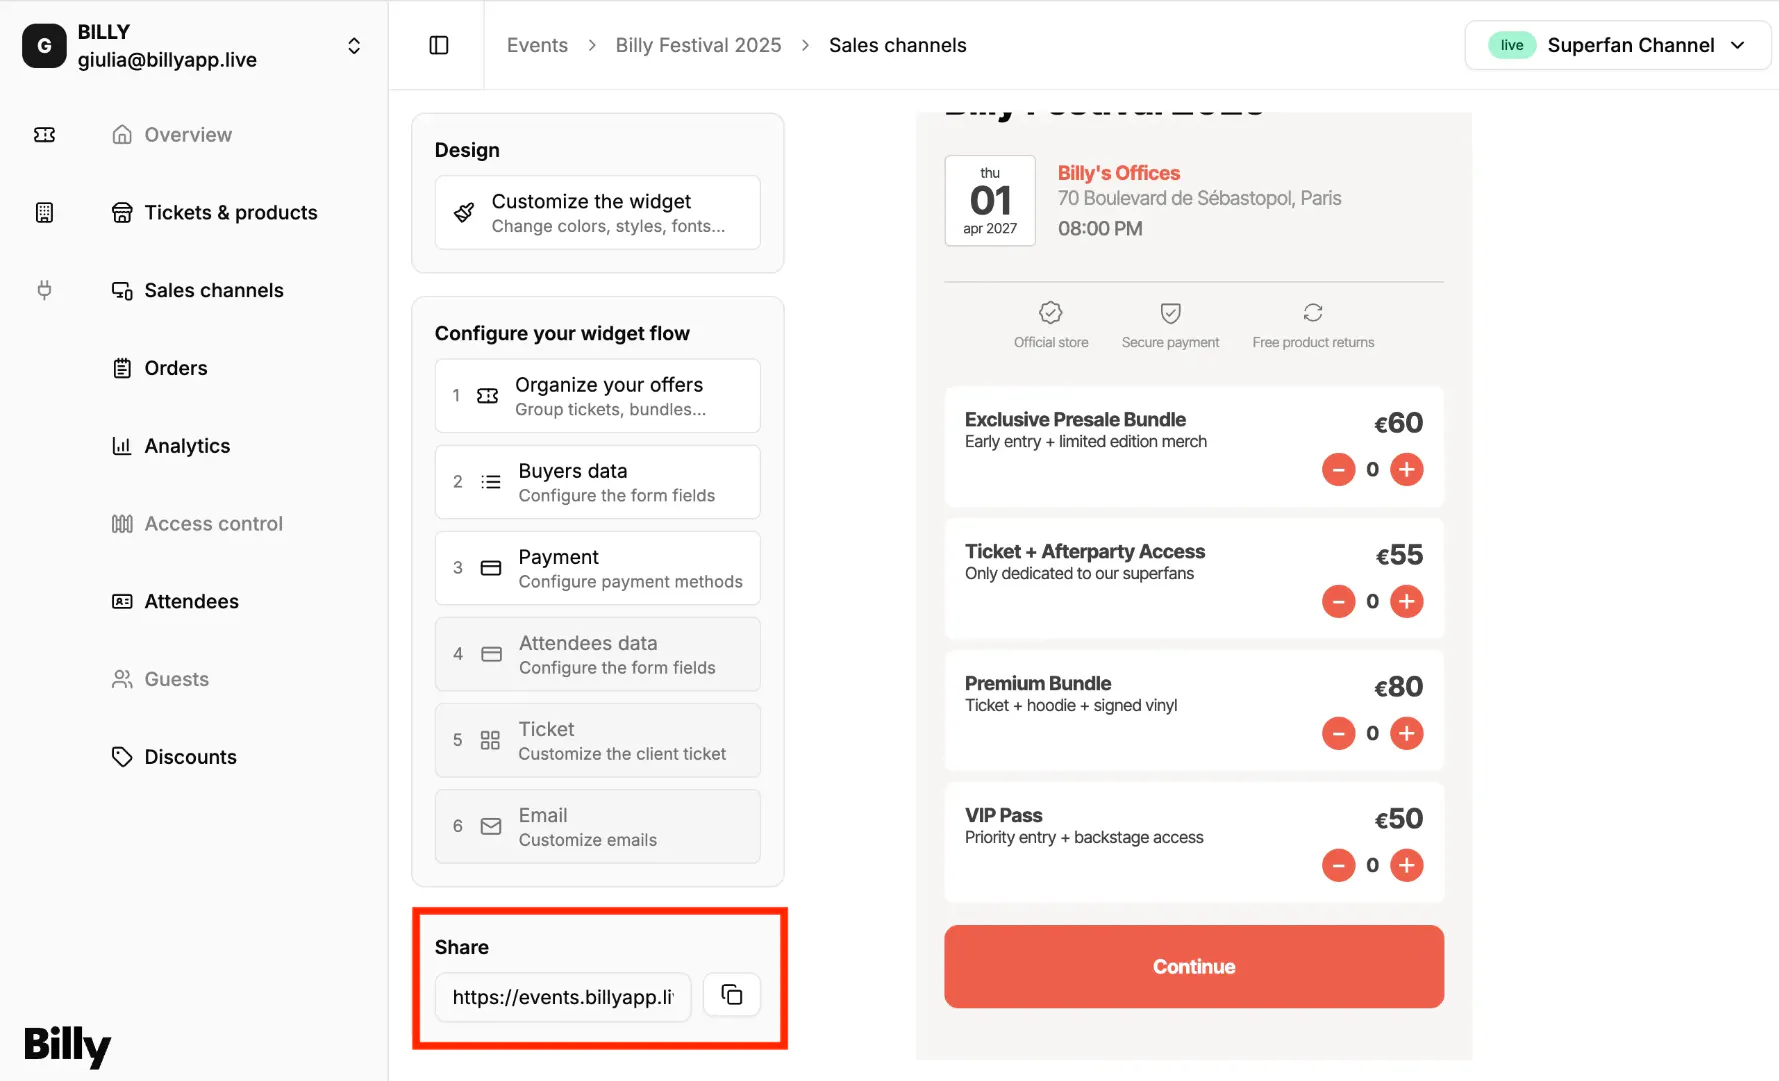

Extract your Sales Channel ID
- The Sales Channel ID is simply the long code at the end of the URL.
- Example URL:
https://events.billyapp.live/12b8b09a-eb23-4d65-ba92-f6059cb18648→ Here,12b8b09a-eb23-4d65-ba92-f6059cb18648is your Sales Channel ID.


Option 1: Embed your checkout flow on a page
You can insert Billy's checkout widget directly on your website. Your attendees will be able to purchase tickets or products without being redirected to third parties. A smooth ticketing experience worth remembering.
In just 2 steps we can make it happen — let's see how below.


To start, please be sure to have at least two pages of your website ready-to-go:
- A home page with a button visitors can click on
- Another page containing Billy's widget, where visitors will be redirected once they've clicked on the CTA.
Step 1. Add Webflow elements
Adding blocks and elements is the mandatory and very first step for all web builders in order to design their own websites.
You can put anything inside a Div Block, including text, picture, code and so on.
- Navigate to the Add Elements Panel on the left
- Add the following two elements to your checkout page in order: a Div Block, then a Code Embed inside it
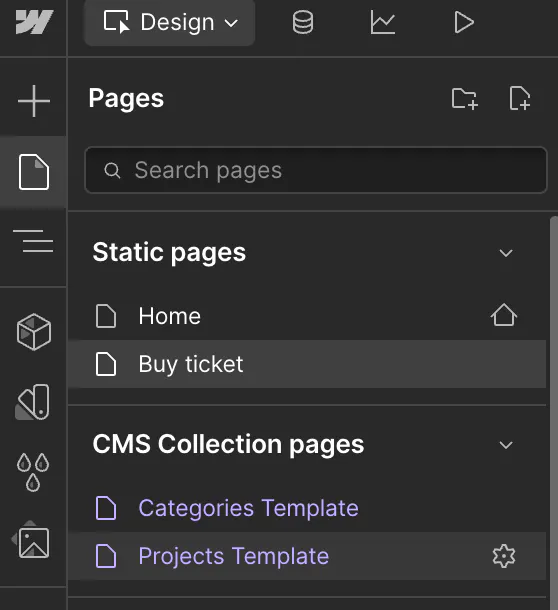

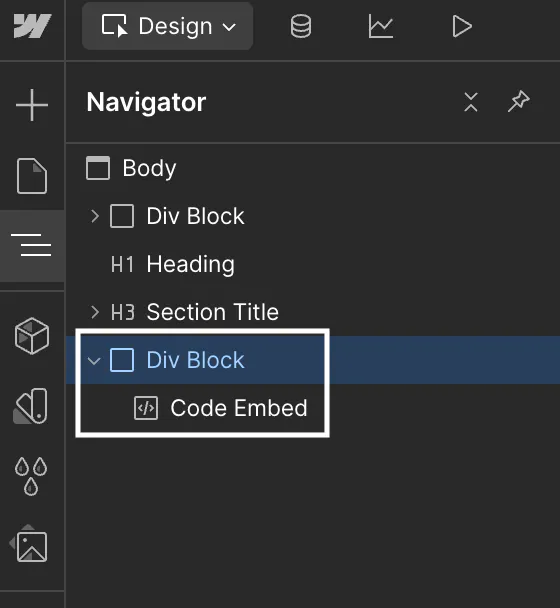
Tip: You can change the widget's position simply by dragging the Div Block up or down in the panel.
Step 2. Copy and paste the widget code
- Double click Code Embed to open the Code Embed Editor
- Now, copy and paste the following code into the editor
<iframe src="[EVENT URL]" allow="payment" width="100%" height="1000px"></iframe>Please be sure to replace [EVENT URL] with your event widget unique URL. You can find this information in the Billy studio, on your event's distribution channel page. Your event URL should look like https://events.billyapp.live/fr/3f532137-dae9-4f16-870b-f3739dfa761a.
- Click Save & Close. You now have a new page with the widget inside — new page well prepared!
Step 3. Link your button with the widget page
- Click your button to open the Link Settings
- Choose the page you just created with Billy's widget.
- Click save or publish, and voilà!
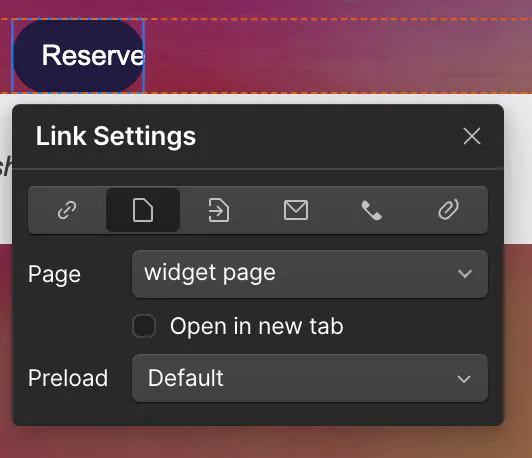


You now have your checkout flow well integrated into your event website, congratulations! You can now publish this updated version and test the user experience.
Option 2: Using a pop-up to display your checkout flow
You can also use a pop-up window to display your checkout flow on a single page. Simply follow the 4 steps below to make the magic happen.


To start, please be sure to have a page with at least one CTA visitors can click. On click, a pop-up window will appear in the same page, instead of redirecting to another page.
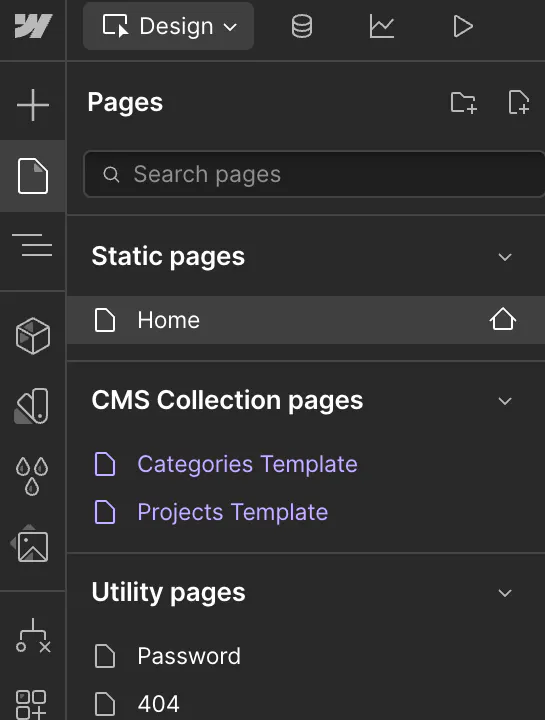
Step 1. Add Webflow elements
It's mandatory to add blocks and elements in the panel as a very first step before adding the code. You can put anything inside a Div Block, including text, picture, code and so on.
- Navigate to the Add Elements Panel on the left
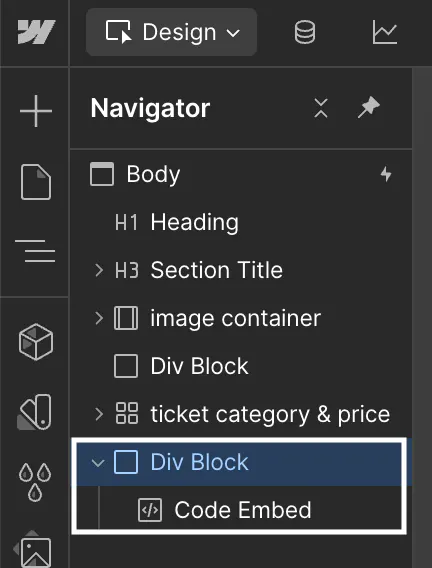
- Add the two following elements into your current page: a Div Block, then a Code Embed inside it


Step 2. Copy and paste the mandatory script
- Double-click the Code Embed element to open the Code Embed Editor
- Copy and paste the following code:
<script type="text/javascript"
        defer src="https://events.billyapp.live/embed.js"
data-host="https://events.billyapp.live"></script>- Click Save & Close to complete the embedding
Tip: The position of these two elements can be anywhere in this page. However, it's a general best practice to put them at the end of the Body tag.
Step 3. Customize the attributes
- Click on your CTA (the Buy Now button in our example below)
- In the right sidebar, select Settings
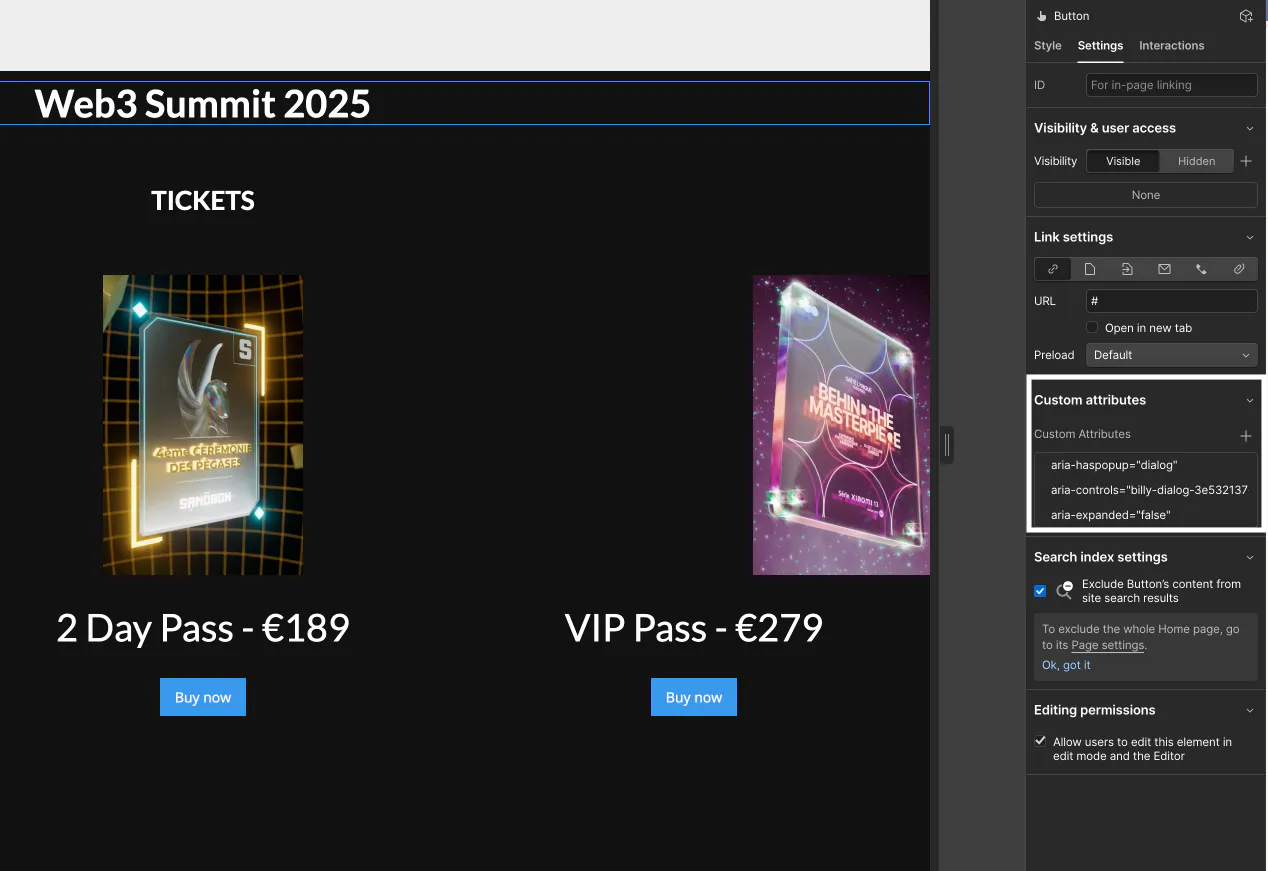

- Under Custom Attributes, input the following three attributes:
aria-haspopup = dialogaria-controls = billy-dialog-[YOUR_SALES_CHANNEL_ID]aria-expanded = false
- The variable
[YOUR_SALES_CHANNEL_ID]needs to be replaced by the unique ID of your widget. - You can find this information in the Billy studio, on your event's distribution channel page.
- Your sales channel ID should look like
c0f35f0d-e408-4a38-a4ba-7c563dc0f995.
Step 4. Connect the Buy Now button to your pop-up window

Now you have the pop-up window configured, the last step is to ensure that when visitors click the specific button, they will have the proper pop-up displayed right away.
- Click the button that you would like to connect to the checkout pop-up window
- Select Mouse click (tap)
- Click On 1st click → Start an animation
- Add New Timed Animation → Hide/Show, and voilà!

You now have your checkout flow pop-up integrated into your event website, congratulations! You can now publish your website in order to preview the pop-up window.