
Create an event
Create and set up your first event in Billy's event studio, from title and location to CSV import.
Learn how to create and set up your first event on Billy's event studio. Creating an event on Billy is quick and easy. This guide will walk you through the process step by step.
Getting started
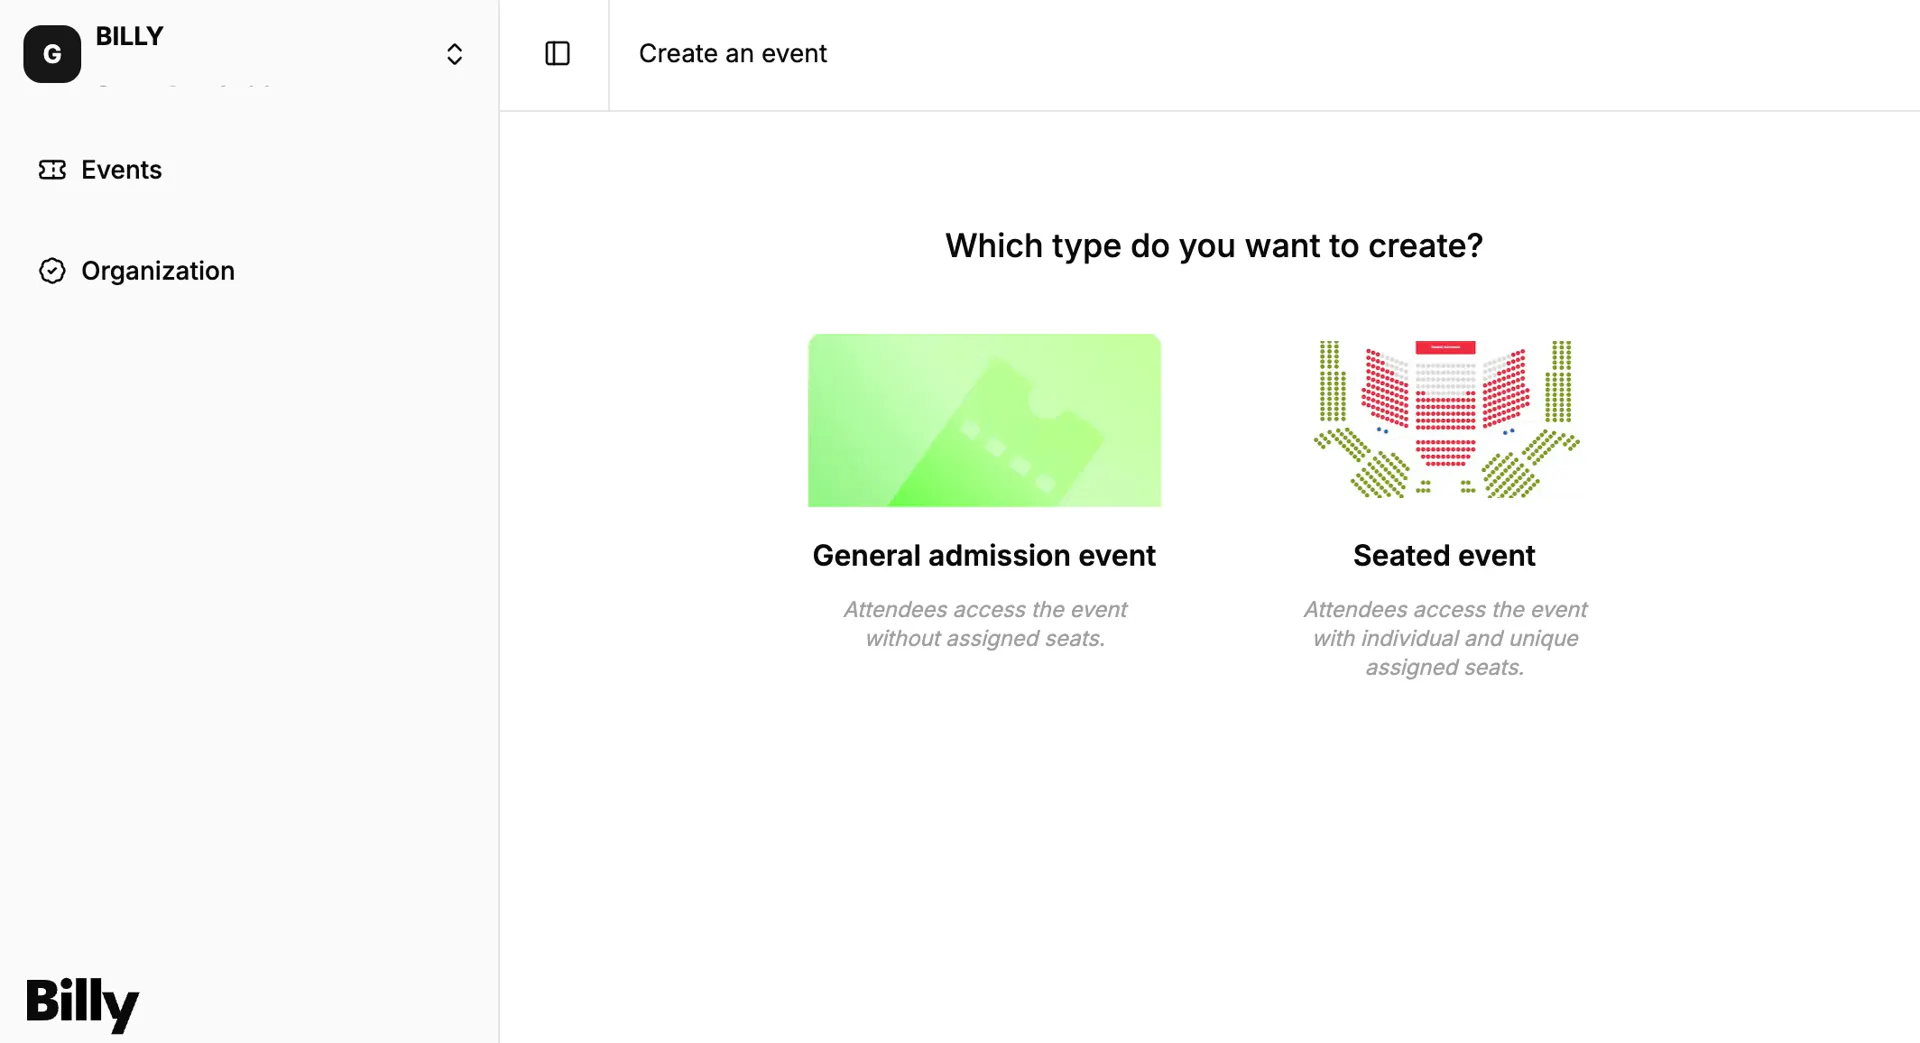
Go to https://studio.billyapp.live/en/events/create or click Create an Event from your home page.
You can choose between:
- General admission event: attendees access the event with no assigned seats.
- Assigned seating event: attendees access the event with individual and unique assigned seats.

Basic event information
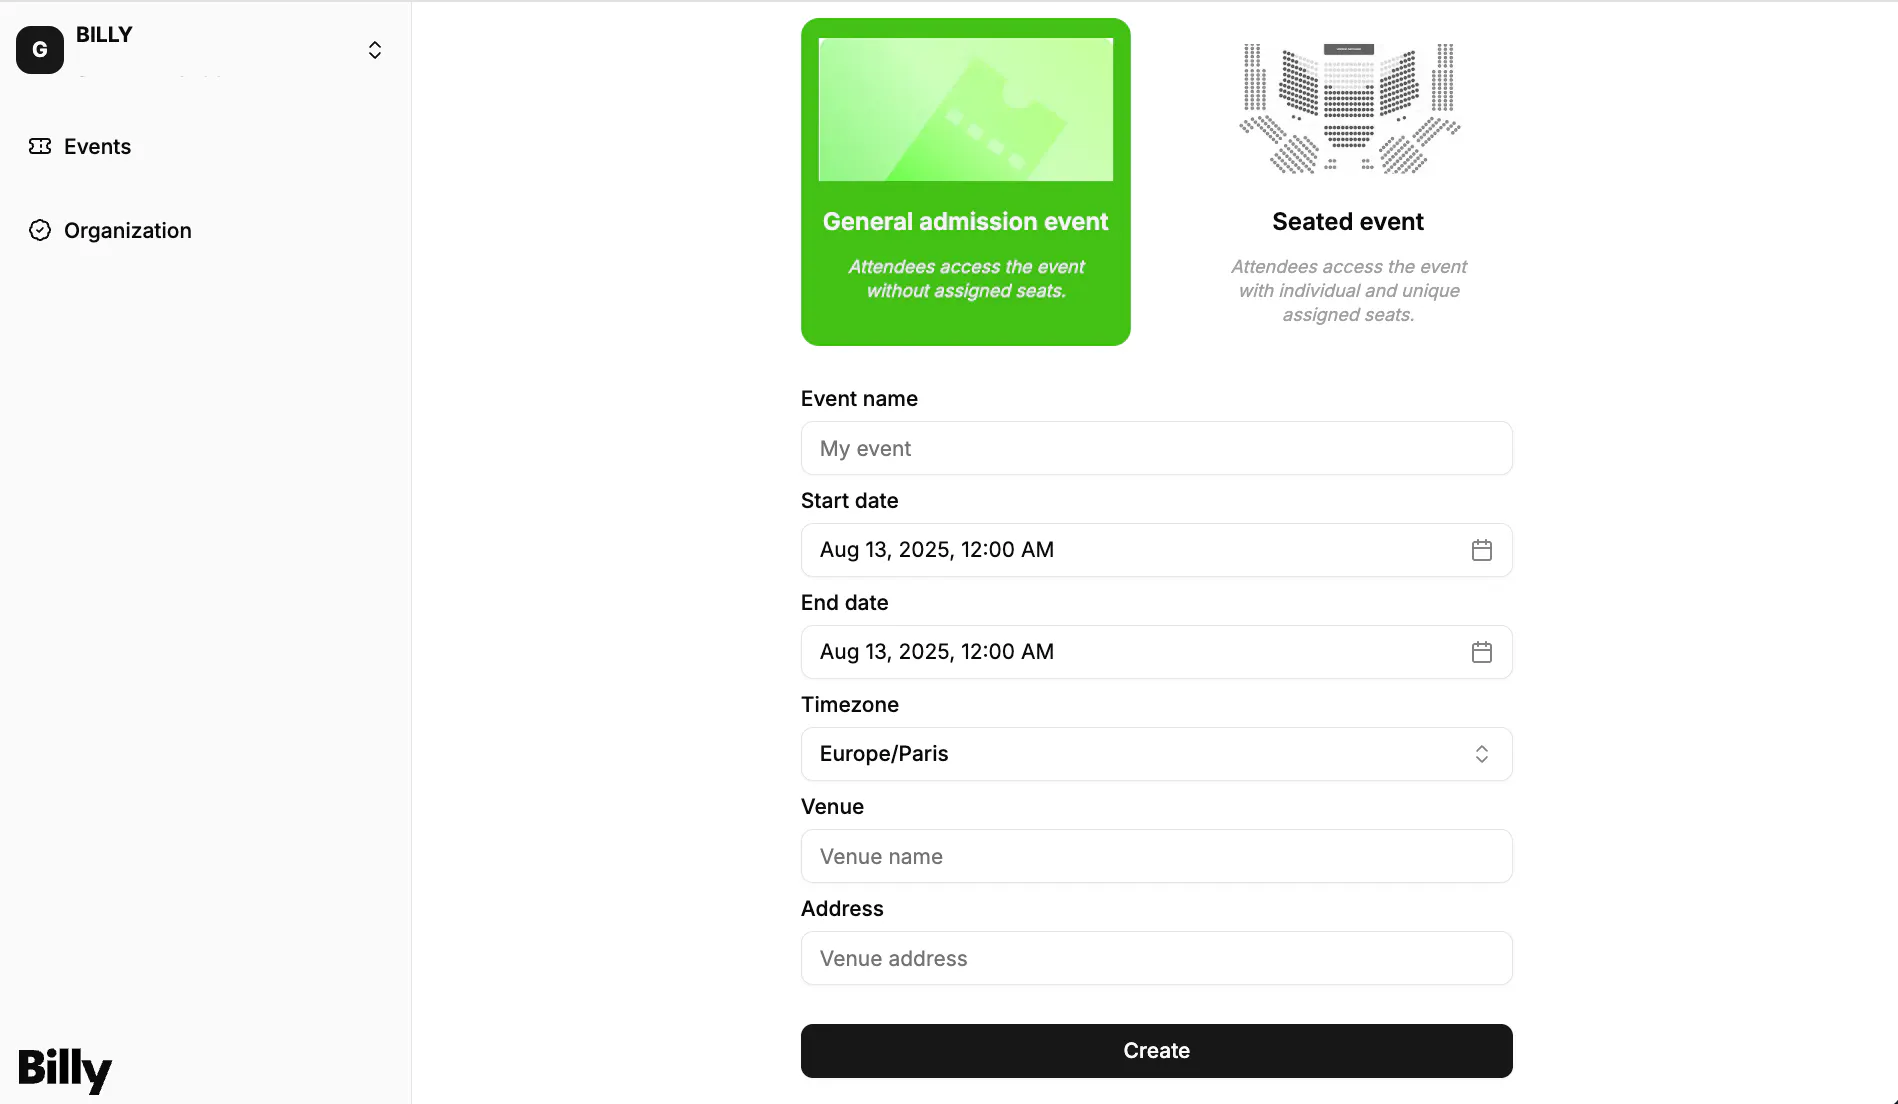
When creating an event, you'll start with the essential details:
Event Title
Enter a clear, descriptive title for your event. This will be the main headline that people see.
Date and Time
- Select the date and time for your event
- Choose the appropriate timezone
- For multi-day events, set both start and end dates
- The timezone will default based on your event location
Setting your location
- Enter the venue name or address

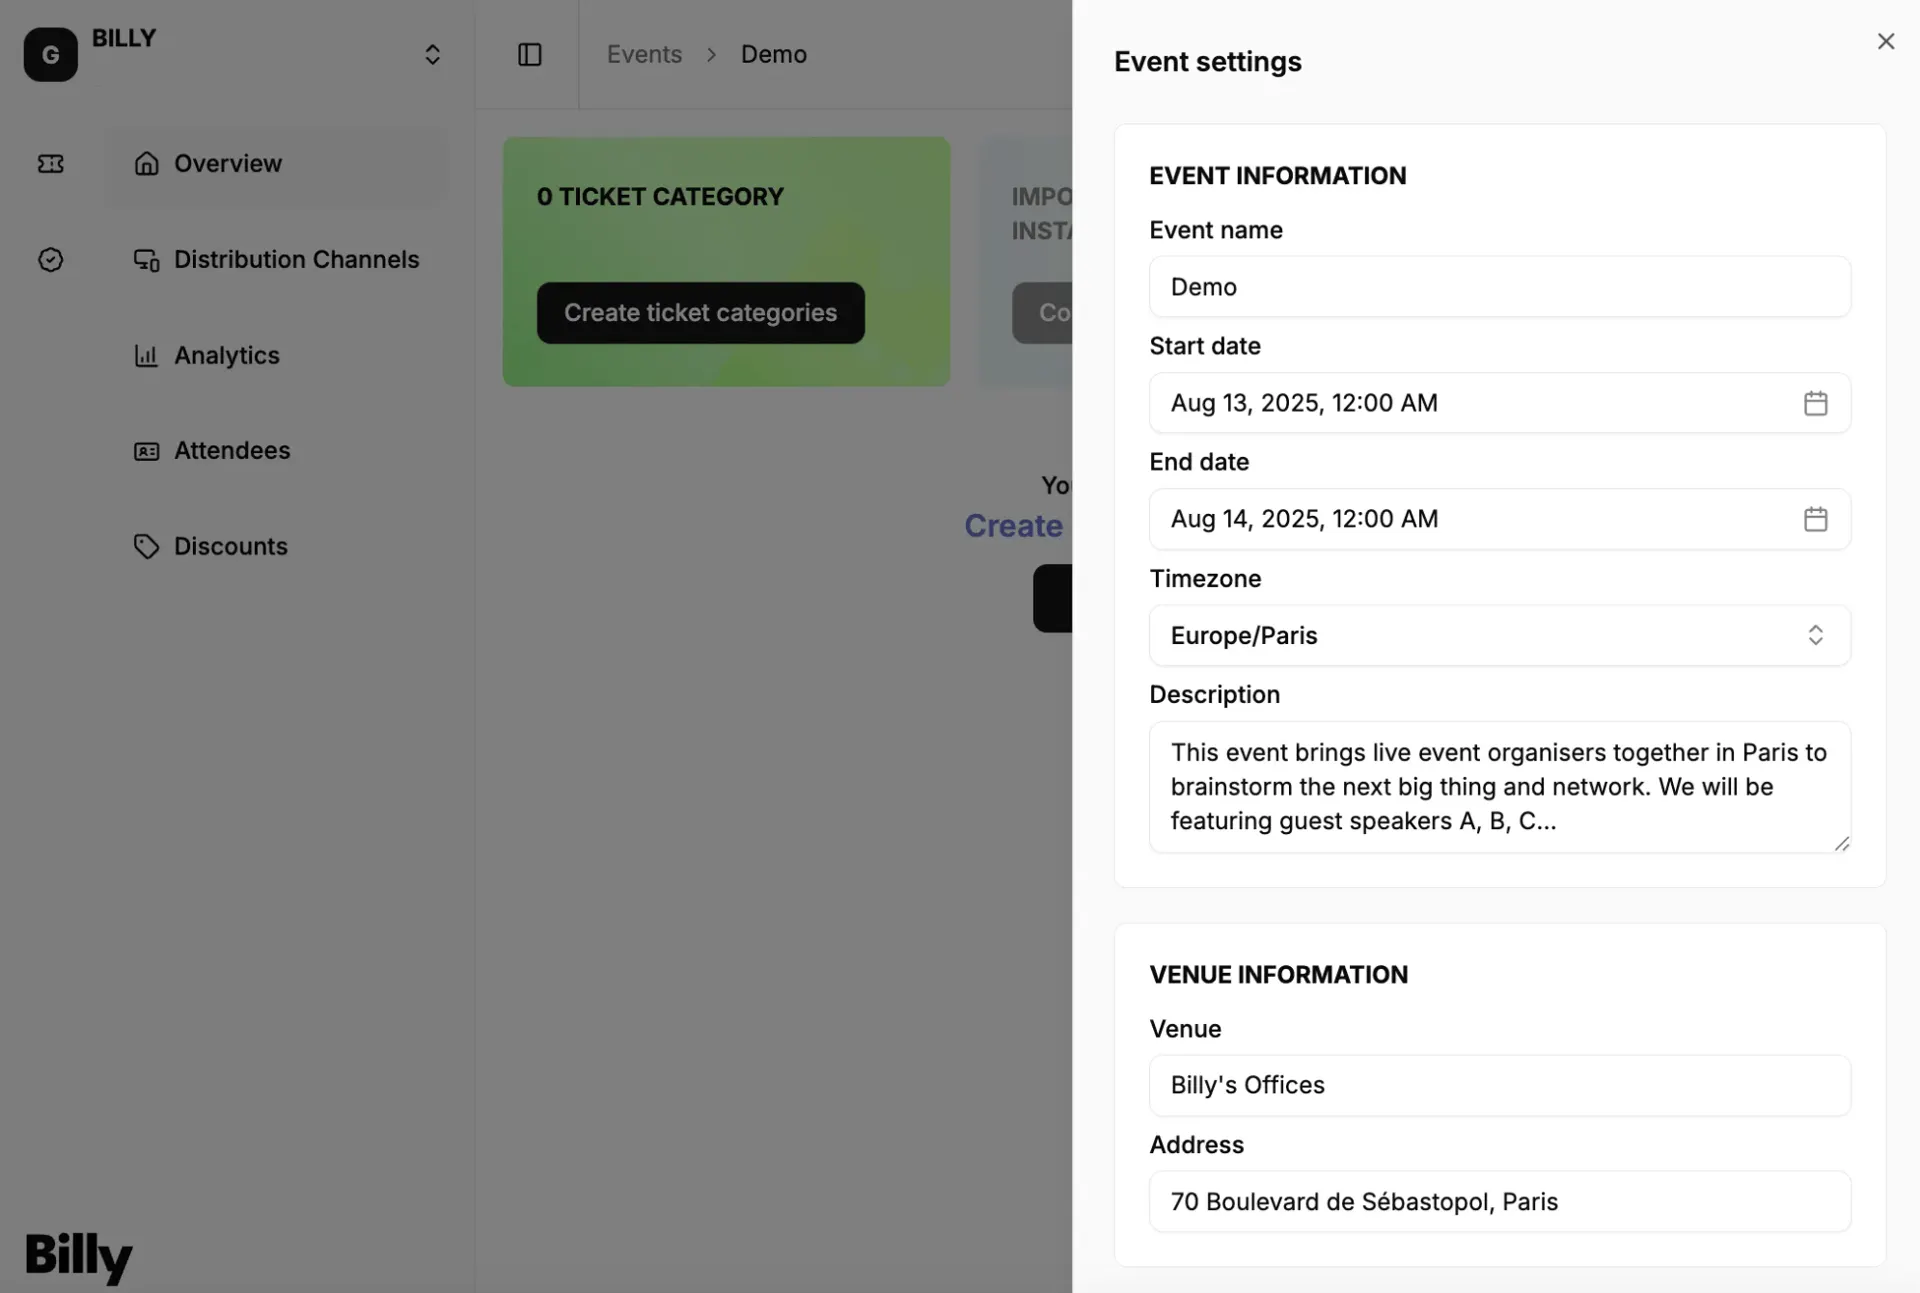
Once you've created your event, you can always update information later by clicking on the Event Settings button in your event overview.

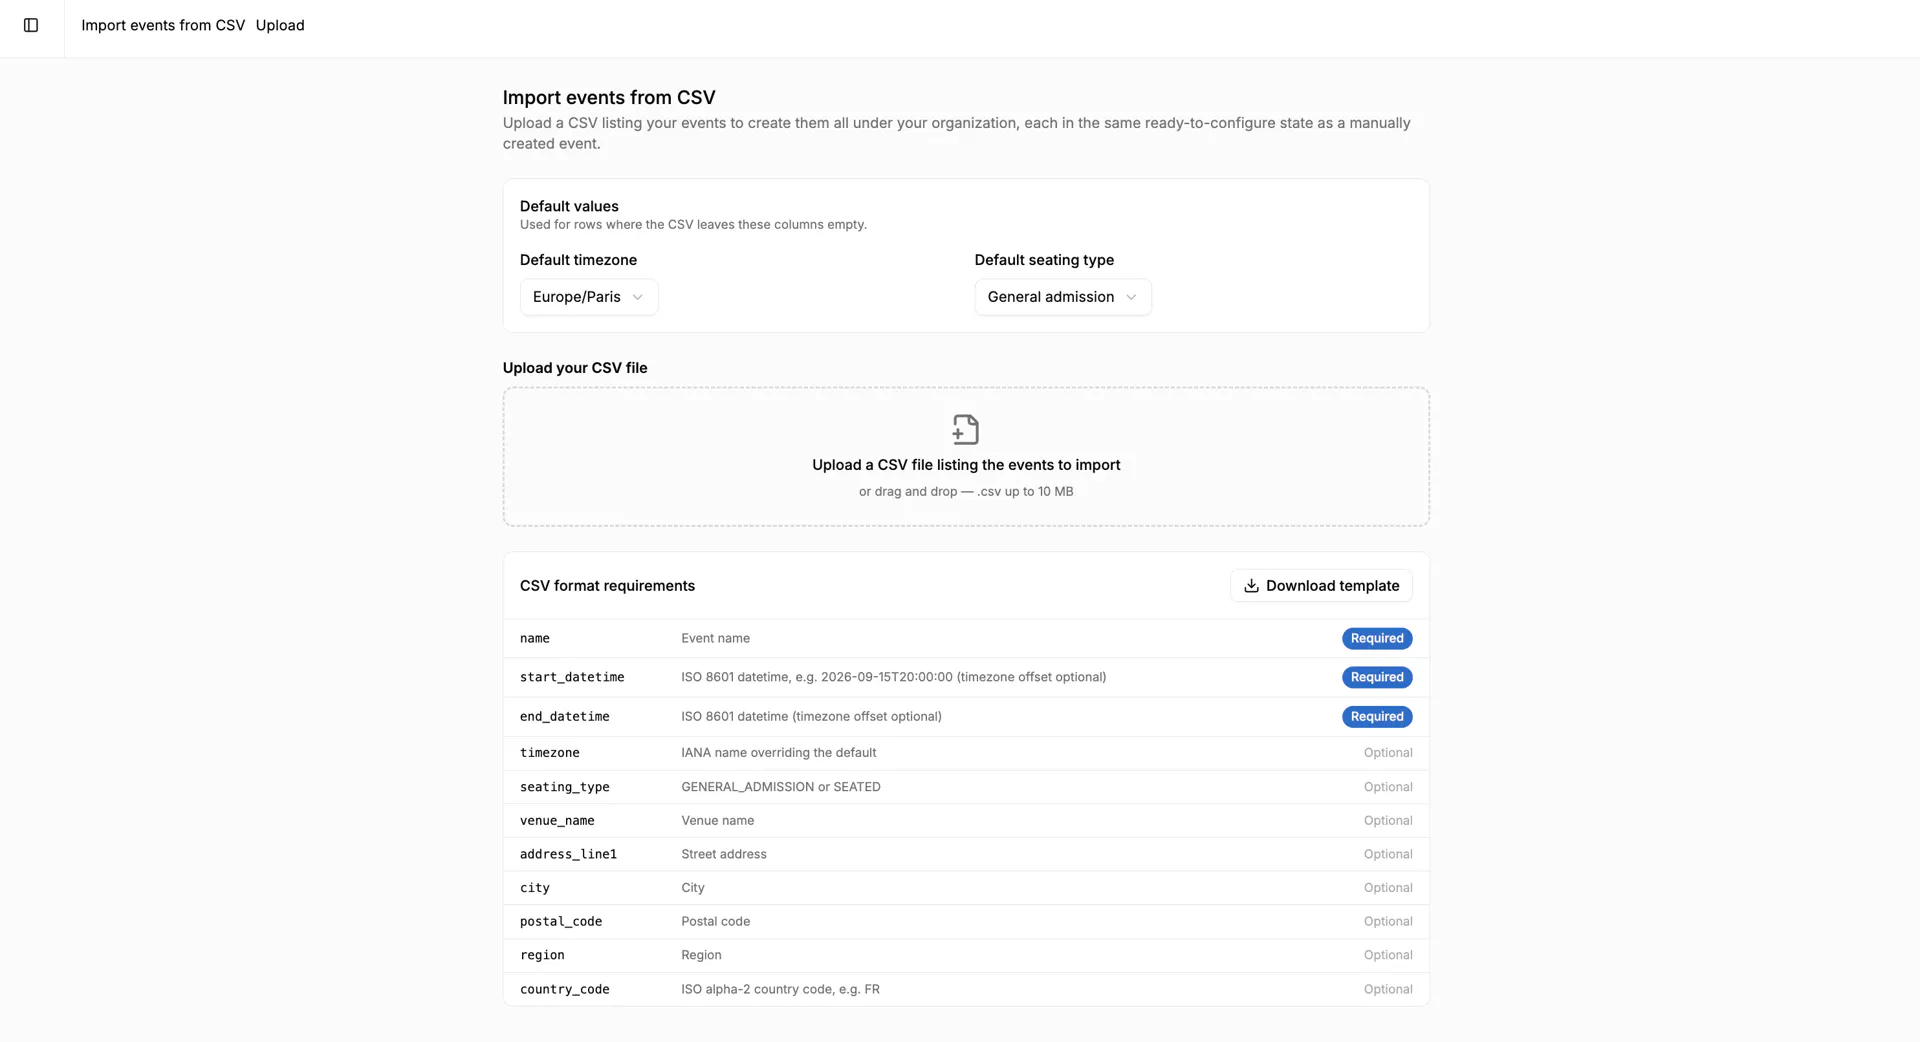
Import multiple events from a CSV
If you are launching a tour, a season, or any batch of dates at once, you can create many events together instead of adding them one by one. Open Import events (CSV), then upload a .csv file that lists your events — Billy checks its format, encoding, and size as you go. On the Review step, each event appears as an editable row, so you can fix any flagged values before confirming. Every imported event is created under your organization in the same ready-to-configure state as one you created by hand.

After creating your event
Once your event is created, you'll have access to the full event management dashboard with additional features like:
- Event shop offers: set up ticket types, products, bundles, pricing and capacity limits
- Sales channel: sell tickets, products and bundles, and collect questions from customers and attendees
- Orders: analyze, manage and refund orders
- Guests: view and manage your guests, send invites and check attendance
- Discounts: create discounts to fit your marketing strategy
- and more…
Ready to create your first event? Head to https://studio.billyapp.live/ to get started.
Please note that there might be some slight changes in the images as we improve our product every week. If you have any questions, feel free to contact us at hello@billyapp.live. We're here to help!