
Configure own Domain name for emails & support email
By default, the emails Billy sends to your customers (order confirmations, refund notices, invitations) come from Billy’s own address (hello@billyapp.live). With a sending domain, those emails leave from an address on your own domain instead, such as noreply@mail.acme.com, displayed under your organization’s name. There are two reasons to set this up:
By default, the emails Billy sends to your customers (order confirmations, refund notices, invitations) come from Billy's own address (hello@billyapp.live). With a sending domain, those emails leave from an address on your own domain instead, such as noreply@mail.acme.com, displayed under your organization's name. There are two reasons to set this up:
- Trust: your customers see your own brand in the sender, not a third party.
- Deliverability: a domain you authenticate yourself (with DKIM and DMARC) is less likely to land in spam.
Setting this up takes three steps:
- Declare your domain in Billy → Billy gives you a few DNS records.
- Add those records at your DNS provider (this happens outside Billy and is the part that takes the longest).
- Come back to Billy, verify your domain, and switch sending on.
Expect about 10 minutes of work, plus some waiting time for DNS to propagate (usually a few minutes, up to 48h in the worst case).
Before you start
You need access to your domain's DNS settings. If you don't manage them yourself, this is usually the person or agency who set up your website.
Choose a subdomain, not your main domain. Use something like mail.acme.com or tickets.acme.com rather than acme.com.
Why? A subdomain keeps your ticketing emails separate from your everyday company email. If something ever goes wrong with the reputation of your ticketing emails, your @acme.com mailboxes are not affected. It also means Billy's records can never conflict with the email records already in place on your main domain.
Pick a subdomain you are not already using for something else. In this guide we use mail.acme.com as the example.
The address customers will see is noreply@ followed by the domain you configure, so mail.acme.com gives noreply@mail.acme.com. The display name is your organization's name in Billy.
Step 1: Declare your domain in Billy
In the studio's left menu, open Organization, then go to Sending domain, type your domain, and click Configure domain.
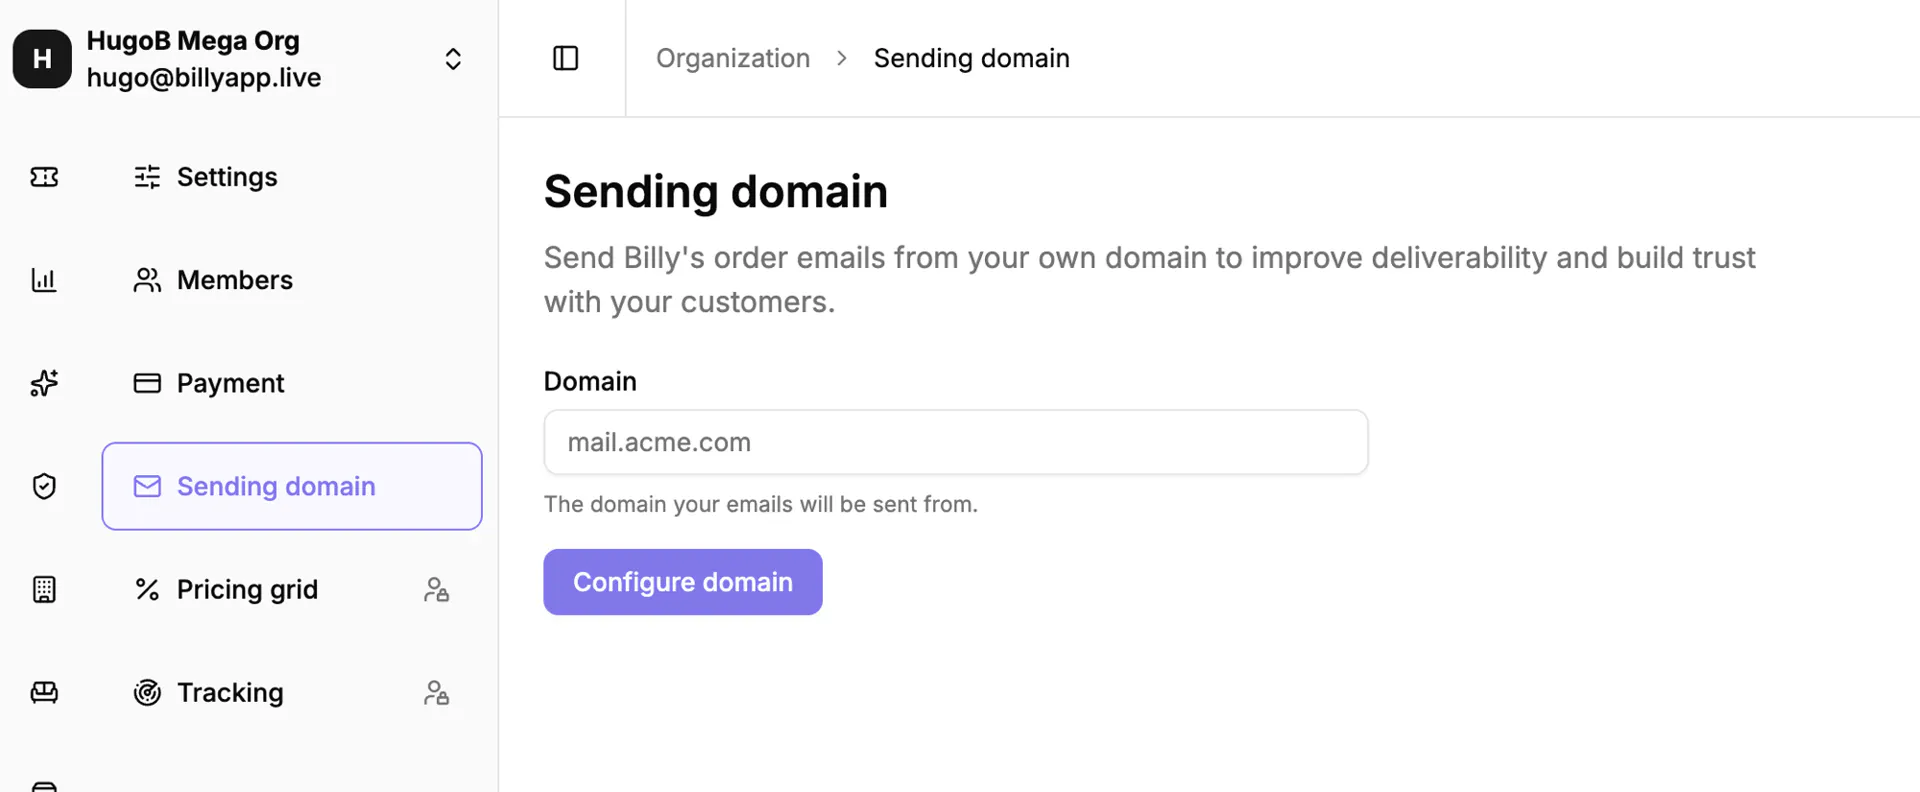

Enter the domain without https://, without www, and without an @:
| ✅ Correct | ❌ Incorrect |
|---|---|
mail.acme.com | https://mail.acme.com |
tickets.acme.fr | noreply@mail.acme.com |
mail.acme.com/ |
Billy registers the domain with its email provider and immediately shows you the DNS records to add. Nothing is sent from this domain yet.
Step 2: Add the DNS records at your DNS provider
This is the step that happens outside Billy. Take the time to read this section, since most setup problems come from here.
Billy shows you three records, all of type TXT, each with a Host / Name and a Value. The copy buttons on the right of each field let you copy them without typos.
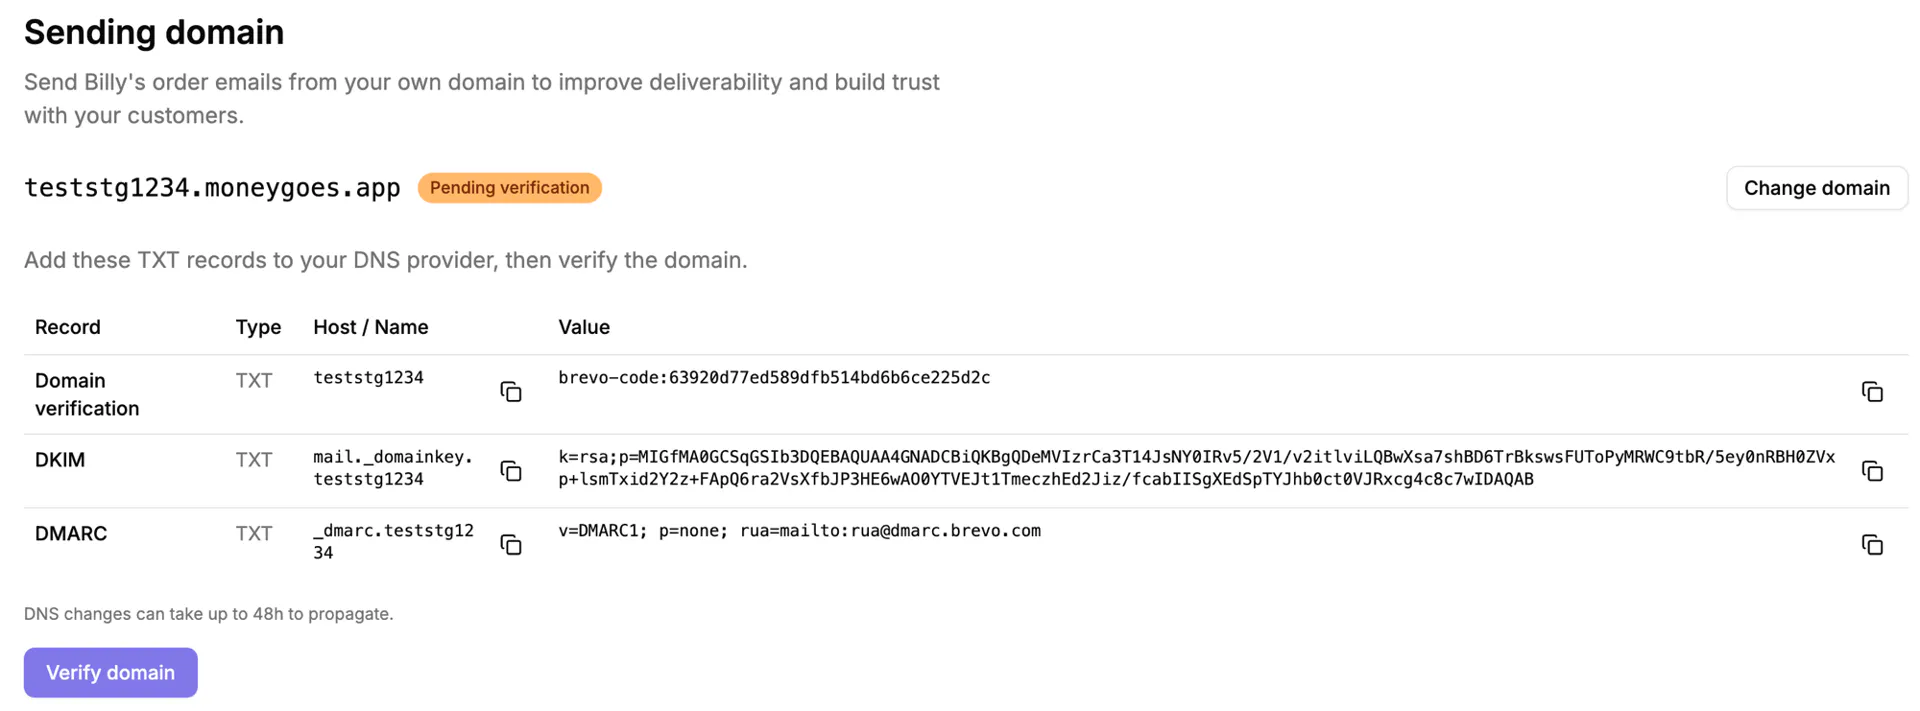

| Record | What it is for |
|---|---|
| Domain verification | Proves to the email provider that you really own this domain. |
| DKIM | Cryptographically signs every email so receiving servers can confirm it wasn't forged or altered. This is the record that matters most for landing in the inbox. |
| DMARC | Tells receiving servers what to do with emails that fail the checks above. Billy's suggested value only asks for monitoring, it does not block anything. |
2a. Find where your DNS is managed
Your DNS is managed by whoever hosts your DNS zone. That is often but not always the company you bought the domain from.
Common ones: Cloudflare, OVH, GoDaddy, Gandi, IONOS, Namecheap, Squarespace / Google Domains, Infomaniak, AWS Route 53, Scaleway…
If you're not sure, log in to the site where you bought the domain and look for a section named DNS, DNS zone, DNS records, Advanced DNS, or Name servers. If that section says your name servers point somewhere else (e.g. *.ns.cloudflare.com), then that is where you have to add the records.
2b. Add a record
The wording differs per provider, but the flow is always the same:
- Open the DNS zone for your domain (
acme.com, the root domain, even though you are configuringmail.acme.com). - Click Add record / Add a record / New record.
- Choose type TXT.
- Paste the Host / Name from Billy.
- Paste the Value from Billy.
- Leave TTL on its default (or pick the smallest value offered, e.g. 300, which makes retries faster).
- Save, and repeat for the other two records.
2c. The one thing people get wrong: the Host / Name field
Billy gives the host relative to your root domain. For the domain mail.acme.com, whose root domain is acme.com, Billy shows:
| Record | Host / Name shown by Billy |
|---|---|
| Domain verification | mail |
| DKIM | mail._domainkey.mail |
| DMARC | _dmarc.mail |
Most providers (OVH, GoDaddy, Namecheap, Gandi, Cloudflare, IONOS…) expect exactly that: the part before your root domain. They usually display your root domain greyed out next to the field, so just paste Billy's value as-is.
A few providers (notably AWS Route 53, and any interface that shows the full name in the record list) expect the complete name. There, you must append your root domain yourself:
| Record | Full name to enter |
|---|---|
| Domain verification | mail.acme.com |
| DKIM | mail._domainkey.mail.acme.com |
| DMARC | _dmarc.mail.acme.com |
How to tell you got it right: after saving, look at the record in the provider's list. It should read mail.acme.com, not mail.acme.com.acme.com. That doubled ending is the single most common mistake: it means you entered the full name in a field that only wanted the relative part. Edit the record and remove the root domain.
2d. Other things to watch out for
- Don't add quotes. Paste the value exactly as Billy gives it. Some providers add the surrounding
"themselves when saving, and that's normal and fine. You should never type them yourself. - The DKIM value is very long and must stay on one line. Use the copy button rather than selecting it by hand; a missing character or an inserted line break makes it invalid. If your provider complains the value is too long, paste it anyway; providers split it internally.
- Don't change the values. They are generated for your domain and are not interchangeable with records from another service.
- Already have a DMARC record? There can only be one DMARC record per name. Since Billy's DMARC sits on the subdomain (
_dmarc.mail), it will not clash with an existing one on your root domain (_dmarc). If a record already exists at_dmarc.mailspecifically, ask whoever manages your email policy before replacing it. - Cloudflare users: TXT records have no proxy setting, so there is nothing to toggle. Just make sure you're in the DNS → Records tab, not the Email Routing tab.
- Keep these records forever. They are not a one-time activation code; if you delete them later, your emails stop being authenticated and start failing. Don't clean them up during a future DNS tidy-up.
Step 3: Verify and switch sending on
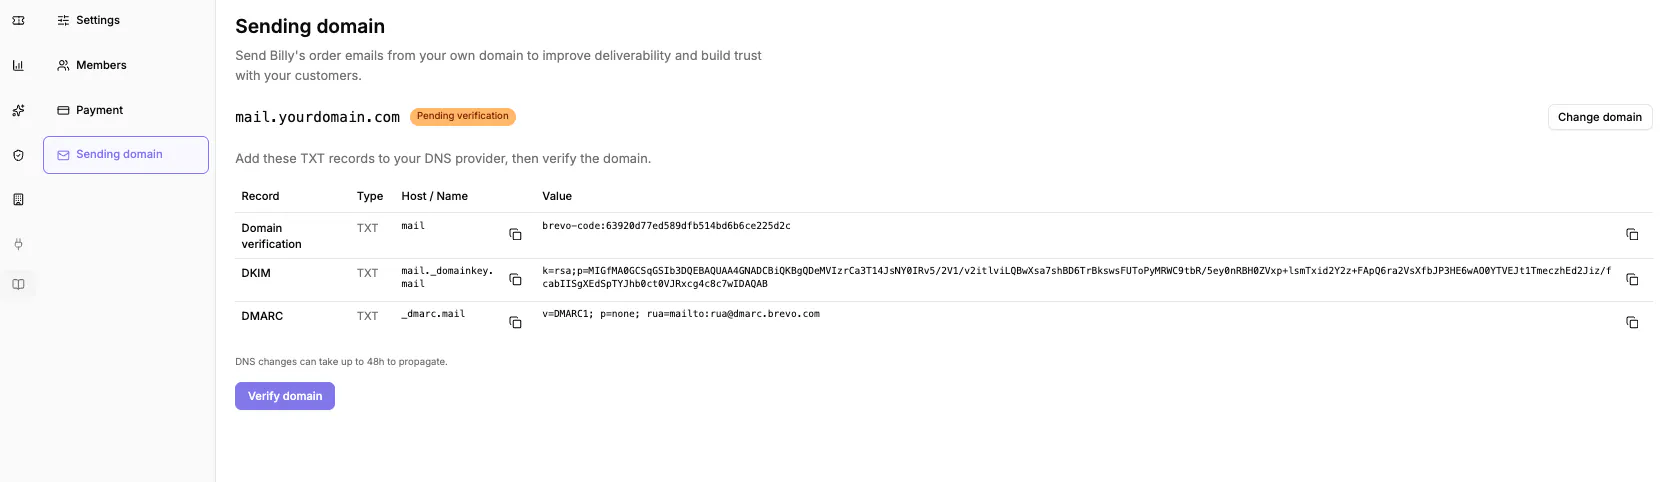

Back in Billy, click Verify domain.
- If your provider has published the records, the domain flips to Verified.
- If not, the page tells you which records are still missing. This is normal right after adding them. DNS changes usually appear within a few minutes, but can take up to 48h. Wait a bit and click Verify domain again. Nothing is lost in the meantime; you can close the page and come back later.
Once verified, you get a Send emails from this domain switch. It starts off: verifying and actually sending are two separate decisions, so you can prepare everything in advance and flip the switch when you're ready.
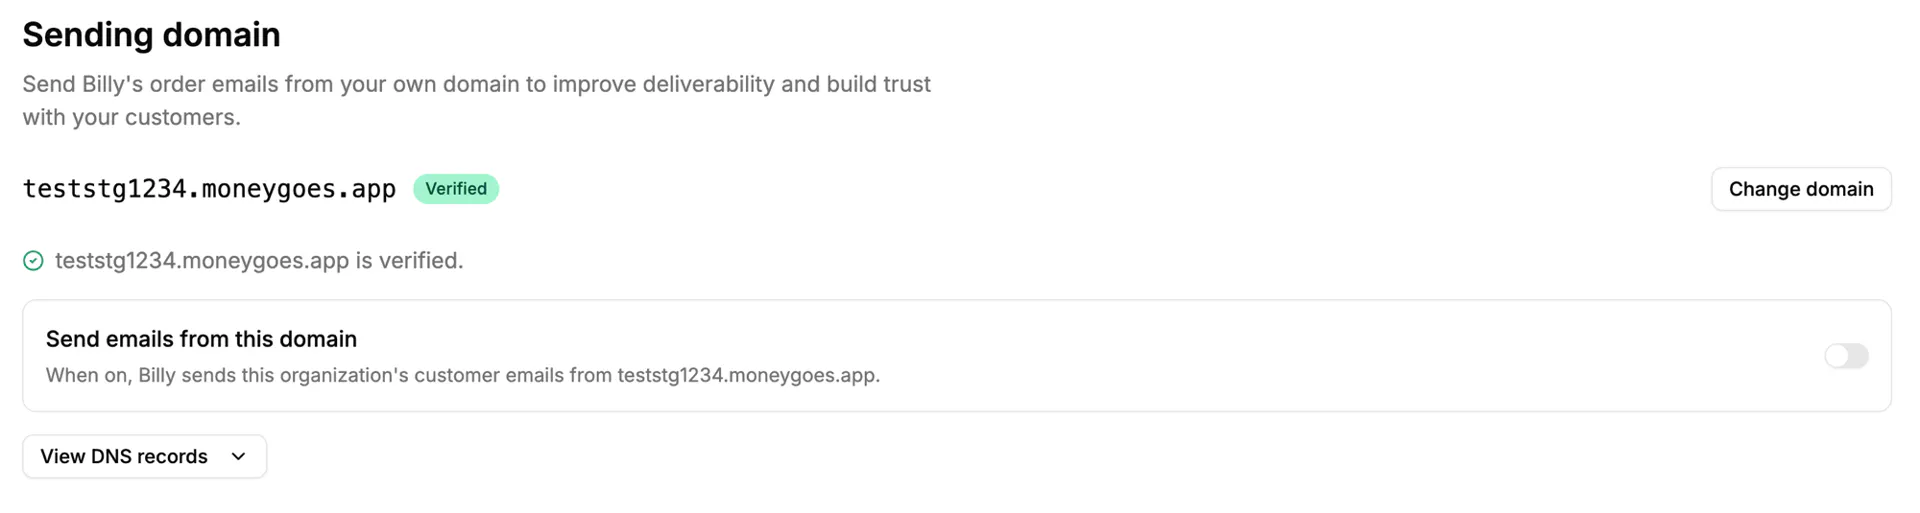

Turn it on. From that moment, your customer emails go out from your domain.
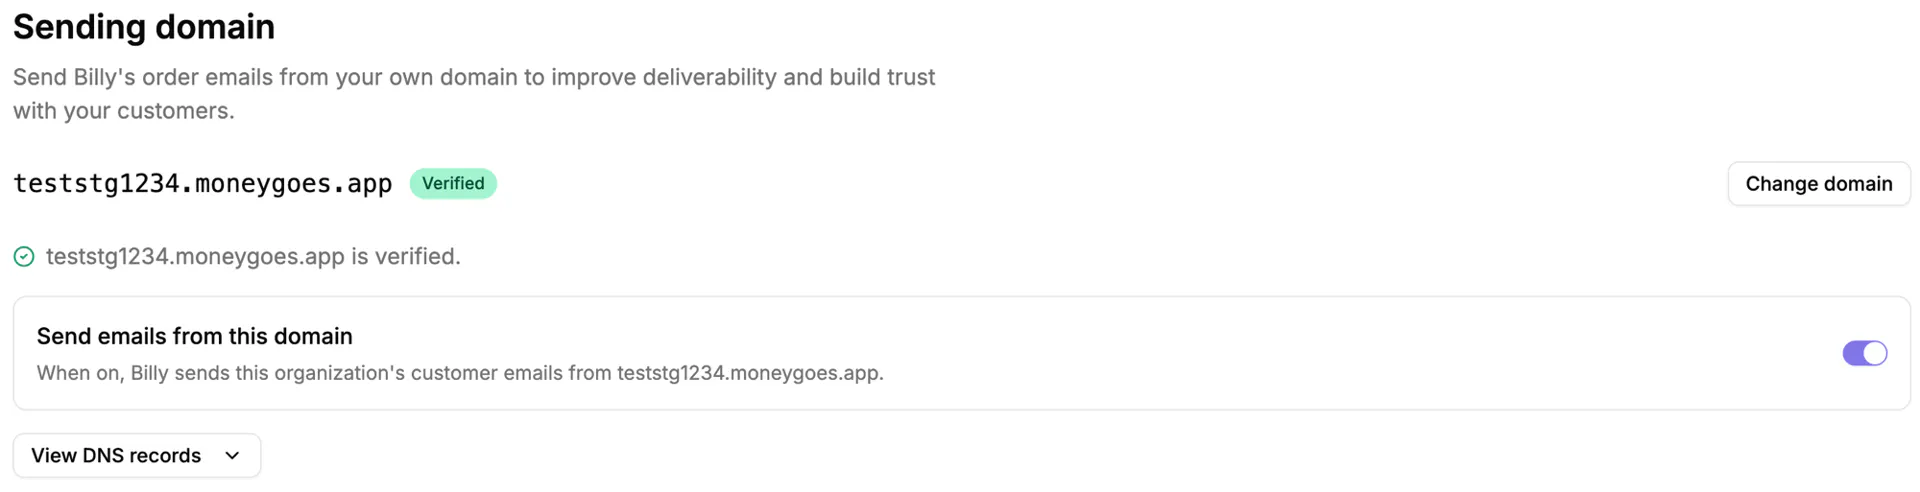

You can turn it back off at any time, and Billy immediately reverts to sending from its own domain. Your DNS records stay in place, so switching back on later is instant.
What changes once it's on
Sent from your domain:
- Order confirmations
- Refund notifications
- Guest invitations (to the guest, and to the invitation's recipient)
Still sent from Billy's domain:
- Emails to your own team (studio invitations, account notifications). These are internal and unrelated to your customer-facing brand.
The content and design of the emails are unchanged; only the sender address and name are.
After setup
Checking it worked
Place a test order on one of your events and look at the confirmation email. The sender should show your organization's name, and the address noreply@ + your domain. In Gmail, "Show original" on the message should show DKIM: 'PASS' for your domain.
Changing the domain later
Use Change domain on the same page. You'll get a new set of DNS records to add, and the new domain starts unverified and not sending, so don't remove the old records until the new domain is verified and sending, otherwise there's a gap where nothing is authenticated.
Viewing the records again
Once verified, View DNS records re-opens the table, with a Re-check button. Use it if you suspect someone changed your DNS: a domain that was verified can fail again if a record is deleted.
Troubleshooting
"Verification is still pending" after several attempts
Check, in this order:
- The doubled-domain mistake: is the record listed as
mail.acme.com.acme.com? See 2c. - The right zone: records must be in the DNS zone of your root domain, at the provider your name servers actually point to.
- Copy errors: a trailing space or a truncated DKIM value. Delete the record and re-paste using the copy buttons.
- Time: if everything looks right, wait. Some providers publish in seconds, others take hours.
You can check what the internet actually sees with a public DNS lookup tool (search for "DNS TXT lookup") on mail._domainkey.mail.acme.com. If the tool returns nothing, the record hasn't propagated, or isn't where you think it is.
"The email provider could not be reached" / an unexpected error
A temporary problem on our side or our email provider's. Retry in a few minutes; if it persists, contact Billy support with your domain name.
I can't turn the sending switch on
The switch only appears on a verified domain. If it disappeared, re-check the records: a DNS record was probably removed.
Emails still come from Billy's address
Confirm the switch is on. If it is, only the email types listed in What changes once it's on are affected; team emails always come from Billy.
Send this to your IT / web agency
Please add the following three TXT records to the DNS zone of acme.com. They authenticate our ticketing emails, sent from the subdomain mail.acme.com.mail → TXT → (domain verification value from Billy)mail._domainkey.mail → TXT → (DKIM value from Billy)_dmarc.mail → TXT → _(DMARC value from Billy)_Hosts are relative to the root domain; if your interface expects fully-qualified names, append .acme.com. Default TTL is fine. These records are permanent; please don't remove them. The exact values are on the Organization → Sending domain page in the Billy studio.
Replace acme.com / mail.acme.com with your own domain, and copy the real values from the studio.